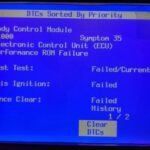
Understanding the wiring diagram for a window air conditioner is crucial for safe installation and troubleshooting. This article focuses on the Panasonic CWXC103HU model and explores how to integrate it with an existing thermostat.
A homeowner wants to control their Panasonic CWXC103HU window AC unit with a pre-existing Honeywell digital thermostat already used for a duct fan. The thermostat successfully controlled the duct fan via a relay, operating on a 24v system. However, the window AC unit presents a different challenge. Initial investigation reveals the AC unit’s control wires operate on a low voltage DC circuit (less than 2V), while other wires carry 115V AC. This discrepancy in voltage necessitates a different approach than the relay setup used for the duct fan.
The goal is to integrate the window AC unit into the existing thermostat setup. The challenge lies in bridging the voltage gap between the 24v thermostat and the low voltage DC controls of the AC unit. Examining the wiring diagram is the first step to understanding the unit’s internal connections and devising a safe and effective control mechanism.
Locating a service manual or schematic for the Panasonic CWXC103HU is paramount. These resources provide a detailed wiring diagram, outlining each component and connection within the unit. The diagram will clarify how the control board interacts with the compressor, fan motor, and other components, enabling the identification of suitable control points for integration with the existing thermostat.
Without the specific wiring diagram, several possibilities exist. One option involves using a relay, triggered by the 24v thermostat, to switch a higher voltage circuit that powers the AC unit on and off. However, directly interfacing the 24v with the low voltage DC controls is not recommended without specific schematic guidance, due to the risk of damage. Another approach involves utilizing a separate low voltage transformer to step down the 24v from the thermostat to a compatible level for the AC control circuit. This approach requires careful matching of voltage and current requirements to avoid damaging the AC unit’s sensitive control board. A dedicated relay designed for low voltage DC applications would then be used to switch the AC unit on and off based on the thermostat’s signal.
Ultimately, the safest and most effective solution requires consulting the wiring diagram for the Panasonic CWXC103HU. This diagram will reveal the correct points to interface with and the appropriate voltage levels for safe operation. Attempting modifications without this crucial information risks damaging the AC unit and potentially creating safety hazards. Once the wiring diagram is obtained, a qualified HVAC technician can provide expert guidance on the best integration method for the specific application.