
Leveraging a physical GPU within a nested ESXi environment for tasks like AI/ML processing or graphics-intensive applications requires a specific configuration. This involves enabling Virtual Input/Output Memory Management Unit (vIOMMU) in your vmx file and understanding its interaction with DirectPath I/O for successful double GPU passthrough. This guide outlines the steps and considerations for achieving this complex setup.
While traditionally considered impossible, double GPU passthrough, where a GPU is passed through from a physical ESXi host to a nested ESXi VM and then to a VM within that nested environment, has become feasible with advancements in vSphere, particularly the introduction of vIOMMU. This functionality is crucial for enabling nested virtualization scenarios requiring access to the full capabilities of a physical GPU.
However, this setup is not without its challenges. Certain conditions must be met, and specific configurations are necessary for successful implementation. For instance, Virtual Hardware-Assisted Virtualization (VHV) is not supported with DirectPath I/O. This guide addresses these challenges and provides a step-by-step approach to configuring double GPU passthrough in a nested ESXi environment.
Key Requirements and Considerations for vmx file IOMMU:
- vSphere Version: vSphere 7.0 Update 3c and later is required for stable double GPU passthrough due to the introduction of vIOMMU. ESXi 8.x initially had a bug preventing this functionality, which has been addressed in later patches.
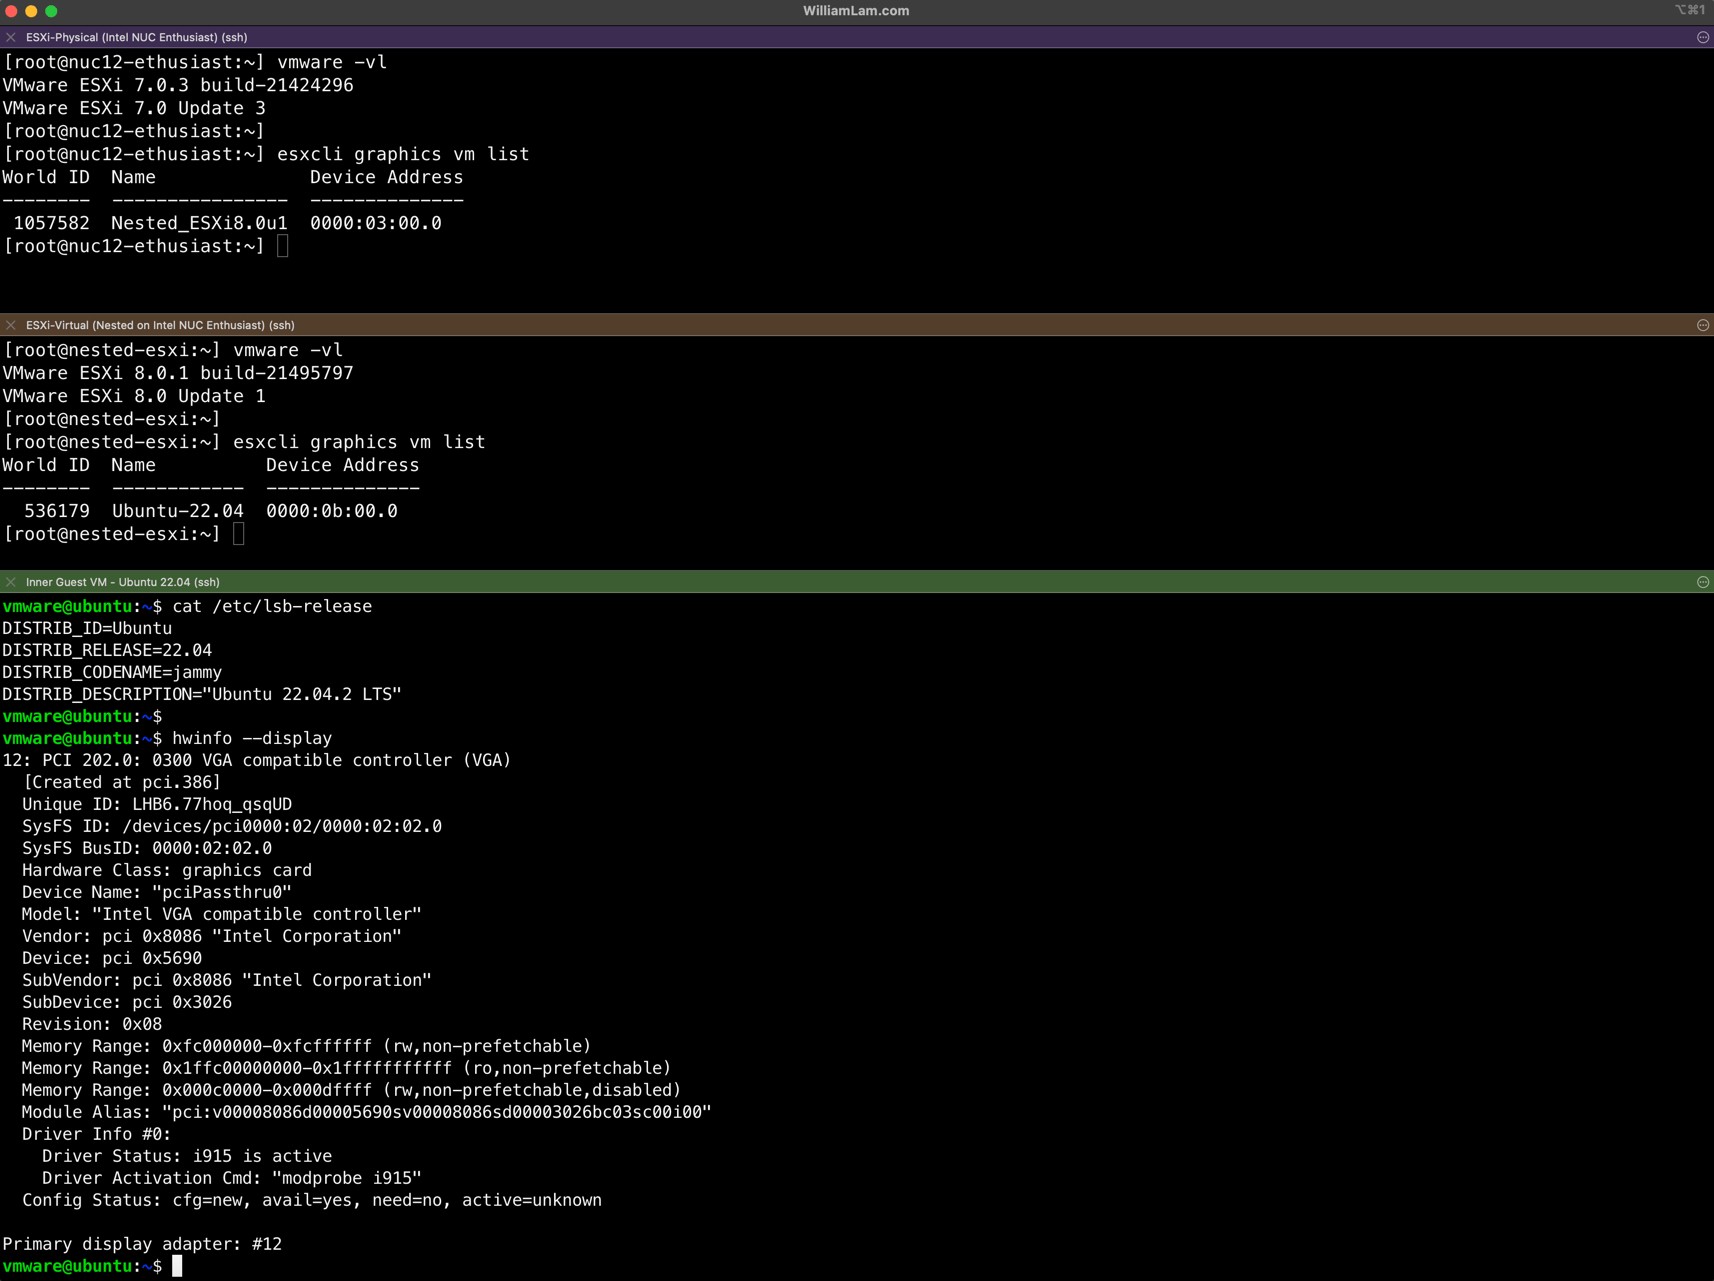
- GPU Compatibility: While this guide focuses on Intel dGPUs (specifically the Intel Arc 770M), compatibility with other GPUs may vary. Additional configuration might be needed. iGPUs with Reserved Memory Region Reporting Structure (RMRRs) are not supported. This incompatibility stems from the way iGPUs manage memory.
vmxFile Modifications: Enabling vIOMMU and configuring PCI passthrough require specific settings within the nested ESXi VM’svmxfile. This includes disabling VHV in the GUI and re-enabling it via advanced settings.- Guest VM Configuration: The inner guest VM receiving the GPU also needs specific
vmxfile configurations for PCI passthrough to function correctly. This often involves adjusting memory settings and enabling 64-bit MMIO.
Configuring Double GPU Passthrough: A Step-by-Step Guide
- ESXi Host Preparation: Install ESXi 7.0 Update 3g (or later) on your physical host.
- Nested ESXi VM Deployment: Deploy a Nested ESXi 8.0 Update 1 (or later) VM.
- Enable Physical GPU Passthrough: Configure your physical ESXi host to enable passthrough for the desired dGPU.
- Configure Nested ESXi
vmxFile:- Disable “Expose hardware assisted virtualization to the guest OS.”
- Enable “Virtual IOMMU.”
- Add the dGPU as a PCI passthrough device.
- Add the following advanced parameters to the
vmxfile:pciPassthru.use64bitMMIO = TRUEpciPassthru.64bitMMIOSizeGB = 16vhv.allowPassthru = TRUEvhv.enable = TRUE(This re-enables VHV, crucial for Nested ESXi)- For AMD Systems:
amd.iommu.supportsPcip = "TRUE"
- Power On and Connect Nested ESXi: Power on the Nested ESXi VM and connect it to vCenter.
- Enable Nested GPU Passthrough: Within the Nested ESXi host, enable passthrough for the dGPU.
- Create and Configure Inner Guest VM: Create an Ubuntu VM within the nested ESXi environment and add the following to its
vmxfile:pciPassthru.use64bitMMIO = TRUEpciPassthru.64bitMMIOSizeGB = 16
- Install Drivers: Install the appropriate Intel Graphics Drivers in the Ubuntu VM.
Conclusion
Successfully configuring double GPU passthrough in nested ESXi using vmx file modifications and vIOMMU offers a powerful solution for specific use cases. This guide has provided a comprehensive overview of the process, emphasizing the critical role of vIOMMU in enabling this functionality. By understanding the requirements and carefully following the outlined steps, you can unlock the potential of physical GPUs within your nested virtualization environment. Remember to consult official documentation for the most up-to-date information and compatibility details.