
KTAG is a powerful ECU programming tool used by professional tuners and automotive enthusiasts. This guide provides a comprehensive walkthrough for installing KSuite 2.25 on a KTAG device with firmware 7.020. Successfully completing this Ktag Install will enable you to read and write data to various vehicle ECUs.
Preparing for KTAG Installation
Before you begin the KTAG install process, ensure you have the following:
- KTAG Device: A KTAG programming tool with firmware version 7.020. This guide specifically applies to the SE135 hardware version. Other versions (SE135-B, SE135-B1, SE135-C, SE135-E) may have slight variations in the driver installation.
- KSuite 2.25 Software: The correct software version is crucial for compatibility. You can find download links from reputable sources online.
- Windows XP Operating System: This specific KSuite version is designed for Windows XP. Compatibility with other operating systems is not guaranteed.
- Computer with USB Port: To connect the KTAG device to your computer.
- Administrative Privileges: Ensure you have the necessary permissions to install software on your computer.
KTAG Install Procedure for KSuite 2.25
Follow these steps meticulously to ensure a successful KTAG install:
Step 1: Initial KSuite Installation
- Insert the KSuite 2.25 installation disk or navigate to the downloaded files.
- Locate the setup file (usually named “setup.exe”) and double-click to run it.
- Follow the on-screen prompts, clicking “Next” to proceed through the installation wizard.
- Accept the license agreement.
- Choose your preferred language for the software interface.
Step 2: Replacing KSuite Files
- After the initial installation, DO NOT launch KSuite.
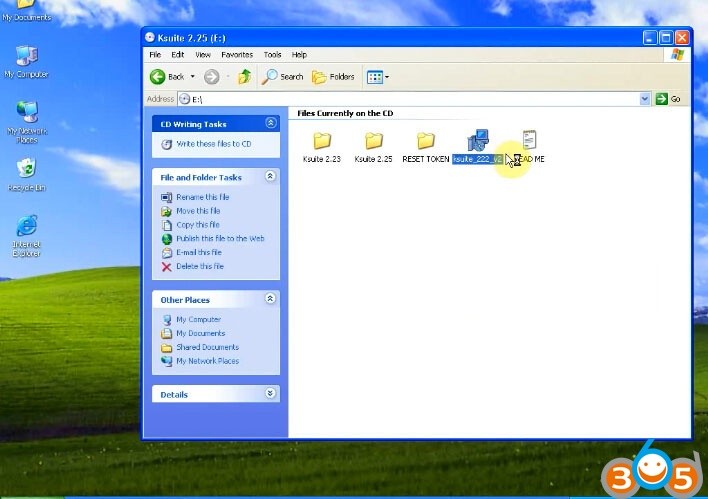
- Open “My Computer” and locate the removable storage device containing the KSuite files. It will likely be labeled “Ksuite 2.25”.
- Navigate to the KSuite installation directory on your computer’s hard drive (typically
C:KSuite). - Delete all files and folders within the
C:KSuitedirectory. - Copy all files and folders (except the “help” folder) from the KSuite 2.25 removable drive to the
C:KSuitedirectory. - Locate the “help” folder on the removable drive within the older KSuite version (e.g., “Ksuite 2.23”) and copy it to
C:KSuite.
Step 3: Installing the Data Loader Driver
- On the KSuite 2.25 removable drive, locate and run the driver installation file for the data loader. This is crucial for KTAG to communicate with your computer.
- Follow the on-screen prompts to complete the driver installation.
Step 4: Verifying the KTAG Install
- Connect your KTAG device to your computer via the USB cable.
- Launch the KSuite application from the
C:KSuitedirectory. - The software should now display “KTAG 2.25” indicating a successful installation.
- You can further verify the installation by checking the hardware information within the KSuite software.
Conclusion
Successfully completing these steps will allow you to utilize the full functionality of your KTAG device with KSuite 2.25. Remember to always refer to the official documentation for your specific KTAG hardware version for any nuanced instructions or troubleshooting. A properly installed KTAG system empowers you with advanced ECU programming capabilities for various vehicles.