
AnyDesk is a powerful remote desktop software solution that allows you to access and control computers from anywhere. This guide provides a detailed walkthrough on How To Use Anydesk, covering everything from installation to advanced features. Whether you’re a beginner or an experienced user, you’ll find valuable information to enhance your remote access capabilities.
Understanding AnyDesk Basics
Before diving into the how-to, let’s differentiate between the AnyDesk client and my.anydesk:
AnyDesk Client: Your Gateway to Remote Access
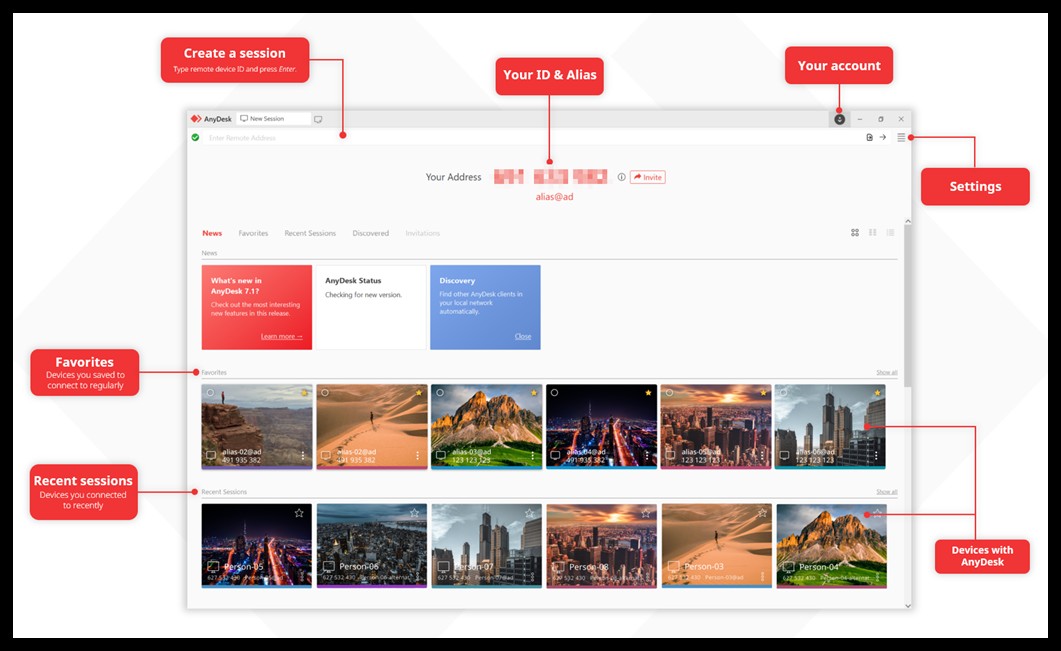
The AnyDesk client is the application you install on your computer (Windows, macOS, Linux, etc.). It enables you to connect to other devices and grant access to your own. Think of it as the main interface for establishing remote connections.
my.anydesk: Centralized Management and Control
my.anydesk is a web-based portal (my.anydesk.com/v2) for managing your AnyDesk account and licenses. It provides advanced features like:
- Session Monitoring: View active sessions and terminate them if needed.
- Client Management: Create custom AnyDesk clients with specific settings and permissions.
- Address Book: Organize frequently accessed devices for quick connections.
- License Management: View and manage your AnyDesk license details.
- User Management: Control user access and permissions within your organization.
Getting Started with AnyDesk: A Step-by-Step Guide
Here’s how to set up and use AnyDesk for basic remote access:
1. Download and Install AnyDesk
Visit the AnyDesk website (anydesk.com/en-gb/downloads/windows) and download the appropriate version for your operating system. Follow the on-screen instructions to install the client.
2. Activate Your License (For Paid Versions)
If you purchased an AnyDesk license, activate it within the client by logging in to your AnyDesk account or manually entering the license key found in your my.anydesk portal.
3. Enable Unattended Access (Optional)
Unattended access allows you to connect to a remote device even when no one is present. This requires setting a password on the remote device within the AnyDesk settings.
4. Establishing a Connection
To connect to a remote device:
- Obtain the remote device’s AnyDesk ID (a unique number) or its assigned Alias.
- Enter the ID or Alias into the “Remote Desk” field in your AnyDesk client.
- Click the connect button. If unattended access is enabled, enter the password; otherwise, wait for the remote user to accept the connection request.
5. Ending the Session
Disconnect by clicking the “X” button in the session window on either the local or remote device.
Advanced AnyDesk Features
For more sophisticated use cases, AnyDesk offers powerful functionalities:
- Custom Client: Create personalized AnyDesk clients with customized settings and branding via my.anydesk.
- REST-API: Integrate AnyDesk with other business systems for automated billing and session management.
- Deployment: Deploy AnyDesk across multiple devices using command-line interfaces or device management tools.
Conclusion
This guide provides a comprehensive overview of how to use AnyDesk, from basic setup to advanced functionalities. With its intuitive interface and robust features, AnyDesk empowers you to seamlessly connect to remote computers and enhance productivity. For more in-depth information, consult the AnyDesk support resources.
