Taking pride in your nail care toolkit is as crucial as mastering the latest nail art techniques. Just like a car mechanic relies on well-maintained tools, nail technicians depend on their instruments to deliver impeccable services. Investing in quality nail care tools is only half the battle; the other half is ensuring they are properly maintained. This guide will walk you through the essential steps to keep your nail care tools and equipment in top condition, ensuring longevity, hygiene, and optimal performance for every client.
Caring for Metal Implements: Clippers, Pushers, and More
Metal implements are the workhorses of any nail technician’s kit. Whether it’s cuticle pushers, nippers, or nail clippers, these tools require diligent care to prevent corrosion, maintain sharpness, and ensure client safety. Contrary to common misconceptions in some salons, disinfectant solutions are not storage units for these delicate instruments.
The correct procedure involves a simple yet crucial two-step process. First, thoroughly wash metal tools with soap and water immediately after each use to remove any nail dust, skin debris, or product residue. A scrub brush can be particularly helpful for reaching intricate areas. Secondly, immerse the cleaned tools completely in an EPA-registered disinfectant for the duration recommended by the manufacturer, typically around 10 minutes. Prolonged soaking is detrimental; excessive exposure to liquids, even for stainless steel, can lead to rust and dulling, compromising their effectiveness and costing you money in premature replacements. Investing in multiple sets of tools ensures you always have disinfected implements ready while others are being cleaned and sterilized, streamlining your workflow and preventing rushed, damaging practices.
After disinfection, tools should be dried thoroughly and stored in a clean, dry, and ideally covered container or lined drawer. Avoid airtight containers as trapped moisture can encourage bacterial growth. Handle your metal implements with care; avoid dropping or tossing them into sinks or disinfection jars, as this can damage delicate blades and tips. When using disinfection jars, carefully place tools with the blades pointing upwards to protect their sharp edges.
Maintaining Electric Files (E-files) for Optimal Performance
Electric files are indispensable for efficient nail shaping and surface refinement, but their intricate mechanisms are susceptible to dust accumulation, a natural byproduct of nail services. Keeping your e-file clean is essential for its longevity and consistent performance. A simple yet effective preventative measure is using a bit shield. This small accessory fits onto the handpiece and acts as a barrier, preventing nail dust from clogging the front bearing and internal components. Coupled with a good salon ventilation system, you can significantly minimize dust intake during filing. Regularly wiping down the handpiece after each client with a clean, dry cloth will further reduce dust build-up.
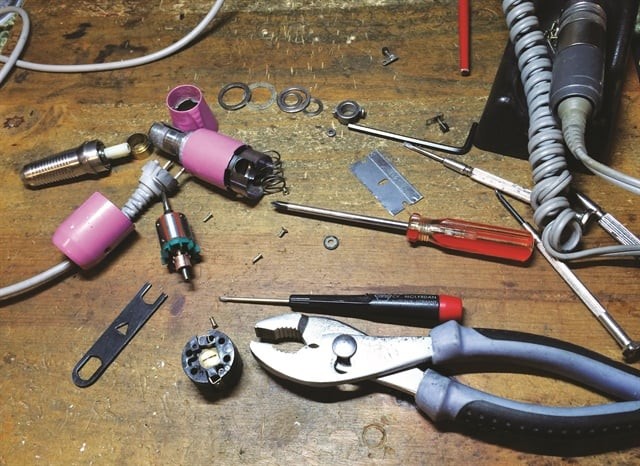
The handpiece is the core of your e-file, housing the motor, while the control box contains the circuit board. Handle the handpiece with care, avoiding drops or impacts that could damage the motor. According to experts like Bruce Atwood from Atwood Industries, routine yearly servicing is often unnecessary. Instead, listen to your e-file. Signs that indicate a need for professional servicing include unusual high-pitched noises, reduced speed, or excessive heat during operation.
E-file bits also require meticulous cleaning and disinfection. After each use, wash bits with soap and water, using a small brush to remove all traces of nail dust and product. Then, disinfect or sterilize them according to your preferred method, strictly adhering to the disinfectant’s instructions regarding immersion time. Over-soaking metal bits can lead to premature wear and rust.
Lamp Care: UV and LED Nail Lamps
Nail lamps, whether UV or LED, are significant investments and crucial for curing gel products effectively. Proper lamp care ensures consistent curing and extends the lifespan of your equipment. When cleaning your lamp, first determine if it’s solvent-resistant. Some lamp materials can be damaged by acetone or acetone-based cleaners. For most lamps, a soft cloth dampened with 99% isopropyl alcohol is ideal for removing product buildup and smudges without causing damage. Regular cleaning after each client service, similar to your workstation surfaces, is essential for maintaining hygiene and lamp performance.
For UV lamps with fluorescent bulbs, monitor the bulb usage. Over time, bulbs lose their intensity, affecting curing effectiveness. Clean bulbs regularly with 99% isopropyl alcohol to remove any product or dust that might block UV light. Industry experts like Doug Schoon suggest rotating fluorescent bulbs halfway through their expected lifespan. This simple trick places the cleaner side of the bulb, which was previously facing the lamp’s interior, towards the nails, maximizing UV exposure, while the potentially product-coated side faces upwards. Typically, UV bulbs require replacement two to three times annually depending on salon volume.
LED lamps feature bulbs that are not designed for replacement. Focus on keeping the lens surface clean. Inspect the bulbs regularly for any product smudges left by clients and clean them promptly. While LED bulbs are long-lasting, both UV and LED lamps generally require replacement after approximately three years of regular professional use to ensure optimal curing power. Pay attention to the power cord as well. Keep cords untangled and positioned to prevent bending at sharp angles, tripping hazards, or accidental pulls that could damage the lamp. When storing lamps, protect the cord and lamp casing from damage.
Autoclave Maintenance for Sterilization
Autoclaves are premium sterilization equipment, and their effectiveness hinges on consistent maintenance. Given their significant cost, proactive maintenance is an investment protection strategy. Before autoclaving, always pre-clean instruments thoroughly. Wash tools with soap and water and use a soft brush to eliminate any debris that could impede sterilization. The autoclave itself also requires daily cleaning. Wipe down interior surfaces and door gaskets with a gentle cleanser and a soft cloth to maintain hygiene and proper sealing.
Avoid overloading the autoclave. Overcrowding can hinder steam circulation, compromising sterilization effectiveness and potentially straining the unit’s components. Regular spore testing is crucial to verify your autoclave’s sterilization performance. Monthly spore testing, or even weekly for high-volume salons, is recommended. Refer to your autoclave’s manual for specific spore testing instructions and frequency recommendations. If you’ve misplaced the manual, download a replacement from the manufacturer’s website or contact them directly.
If your autoclave requires distilled water, using it is non-negotiable. Tap water contains minerals that can leave deposits and residues inside the unit, affecting its performance and longevity. Annual professional servicing is recommended for autoclaves. A qualified technician will perform a comprehensive cleaning, inspection, testing, and recalibration, replacing worn gaskets, seals, or filters as needed. Always familiarize yourself with your specific autoclave model’s maintenance requirements to ensure optimal operation and longevity.
By diligently following these maintenance guidelines for your metal implements, e-files, lamps, and autoclaves, you not only safeguard your financial investment but also uphold the highest standards of hygiene and client care in your nail practice. Well-maintained tools are a reflection of your professionalism and commitment to excellence in the nail care industry.