Winter is the perfect time for gardeners to rest and rejuvenate, and it’s also an ideal season to show some love to our hard-working yard tools. While Ben Vanheems has expertly covered pruner and small hand tool care, here we’ll focus on the often-overlooked wooden handles of our larger gardening companions. From shovels to hoes, learning How To Care For Yard Tool Handles through proper cleaning and oiling is essential. This simple maintenance will not only extend the lifespan of your tools but also make them more comfortable and enjoyable to use, ensuring they are ready to tackle spring gardening tasks with ease.
Caring for wooden handled garden tools through cleaning and oiling ensures they remain in excellent condition and last longer.
Cleaning Wood Handles: Removing Dirt and Grime
During the busy gardening season, tools can easily get scattered and forgotten. Start your tool care routine by gathering all your yard tools. For an initial clean, especially if the weather is mild, wash tool handles with hot, soapy water and a stiff brush. This effectively removes caked-on dirt and grime. However, for a quicker, perhaps more winter-appropriate method, you can clean dry tool handles using a metal brush and a damp rag. The aim is to eliminate soil and buildup from the handle’s surface and crevices. If you find any splinters or rough patches, gently smooth them down with fine sandpaper for a comfortable grip.
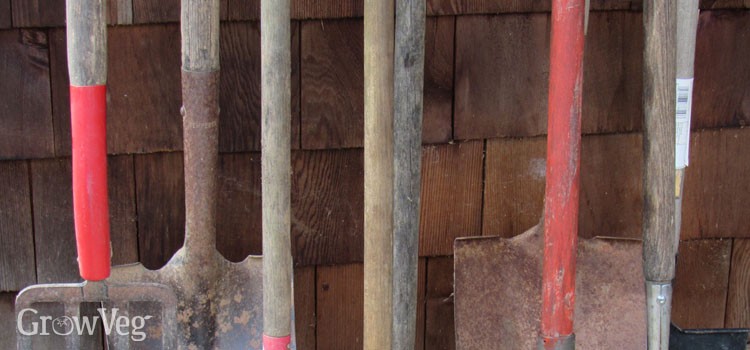
A helpful tip learned from working with a native plant rescue group is to mark tool handles with bright tape or paint. This simple trick prevents tools from being misplaced or mixed up, especially when working in groups or larger gardens. Even in a personal garden, marking frequently used tools with bright colors like red for spades and forks, or staining a favorite hoe handle orange, makes them easily identifiable and less likely to be lost.
Regular oiling of clean and dry wooden handles protects them from moisture and soil, preventing dryness and brittleness.
Oiling Wood Handles: Protection and Preservation
Once the wood handles are thoroughly clean and dry, applying a coat of oil is crucial for their long-term care. Oiling wood handles effectively repels moisture and dirt, preventing them from becoming dry, cracked, and brittle over time. While linseed or tung oil are commonly suggested for wood treatment due to their quick-drying properties, household options like coconut oil or walnut oil can also work effectively. For optimal oil penetration, it’s best to bring your tools into a heated space, as room temperature enhances oil absorption into the wood.
To properly oil your tool handles, liberally saturate a cloth with your chosen oil and generously apply it to the wood. Allow the oil to soak in for about ten minutes, then wipe off any excess with a clean, dry cloth. Handles that are older or have been exposed to intense summer sun might require a second or even third coat of oil for full saturation. The transformation after oiling is often remarkable, restoring the wood’s natural beauty and feel.
Don’t forget the metal parts of your tools! As a final step in tool handle care, apply a light coat of oil to the metal blades and heads. Any type of oil will work here, even vegetable oil from your kitchen. A quick wipe down with vegetable oil helps to prevent rust and keeps your tools looking their best.
Well-maintained wooden handles enhance the overall pleasure of using garden tools.
While thorough sanding and sharpening are best saved for spring, as blades can still corrode during damp winter storage, taking the time to care for your tool handles now offers immediate rewards. The simple act of picking up a restored tool with a smooth, oiled handle instead of one covered in dried mud brings a small but significant moment of satisfaction. This simple care for your yard tool handles will not only make your tools last longer but also bring joy to your gardening tasks. Try it and experience the difference.