
Are you tired of struggling with dull, rusty pruning tools that make gardening a chore? It’s a common frustration for gardeners at all levels: you’re ready to tend to your plants, but your pruners are sticking, tearing instead of cutting cleanly, or covered in rust. Using poorly maintained pruning tools isn’t just difficult; it can actually harm your plants, leaving them vulnerable to disease and pests due to ragged, uneven cuts.
Just like any precision instrument, your pruning shears, loppers, and other cutting tools require regular care to function optimally. Proper maintenance not only ensures they last longer, saving you money in the long run, but also plays a vital role in maintaining the health of your garden. Clean, sharp cuts promote faster healing and reduce the risk of infection for your precious plants. If you’ve been neglecting your pruning tool maintenance, now is the perfect time to learn how to give them the care they deserve.
Maintaining your pruning tools in top condition is simpler than you might think. Let’s delve into the essential steps you should take after each use and for seasonal upkeep to guarantee your tools are always ready for the task at hand.
Daily Care: Cleaning Your Pruning Tools After Each Use
After each pruning session, a quick clean-up is crucial to prevent the buildup of sap, dirt, and potential pathogens. Make it a habit to wipe down your pruning tools immediately after you finish working in the garden.
The process is straightforward:
- Disinfect the Blades: Using a cotton pad or cloth dampened with rubbing alcohol or hydrogen peroxide, thoroughly wipe the blades of your pruners. Disinfecting wipes are also a convenient option. This step removes plant sap and sterilizes the blades, preventing the spread of bacteria and fungal spores between plants.
- Lubricate and Polish: Apply a drop of vegetable oil to a piece of steel wool and gently polish the blades. This not only removes any remaining residue but also lubricates the blades, ensuring smooth operation and preventing rust formation. Mineral oil or specialized tool oil can also be used for lubrication.
This simple daily routine will significantly extend the life of your pruning tools and keep them performing at their best.
Seasonal Pruning Tool Maintenance: Deep Cleaning and Sharpening
While daily cleaning is essential, seasonal maintenance provides an opportunity for a more thorough overhaul. At the end of each pruning season, or even mid-season for heavily used tools, dedicate some time to deep clean and sharpen your pruning tools.
Here’s a step-by-step guide to seasonal maintenance:
- Disassembly: Carefully disassemble your pruners. Most bypass pruners can be taken apart by unscrewing the central pivot bolt. Anvil pruners may have a slightly different mechanism, but the goal is to separate the blades and handles for individual cleaning.
- Thorough Cleaning: Wash each component separately using warm, soapy water. Use a scrub brush or old toothbrush to remove any stubborn sap, sticky residue, or dirt buildup. Pay close attention to joints, crevices, and around the blade pivot point where debris tends to accumulate.
- Sterilization: After washing and rinsing, wipe each part with rubbing alcohol or a sterilizing solution. This ensures all parts are disinfected, eliminating any lingering pathogens.
- Drying and Reassembly: Allow all parts to air dry completely before reassembling your pruners. Crucially, never store your pruning tools while they are still wet, as moisture is a primary cause of rust.
- Sharpening: Now is the ideal time to sharpen your pruning blades. Dull blades crush plant stems, making them vulnerable to disease. Use a sharpening tool such as a fine-toothed file, a sharpening stone, or a specialized pruner sharpener. Sharpen the beveled edge of the blade, following the existing angle, and remove any burrs from the flat side. Refer to guides on “how to sharpen pruning shears” for detailed instructions and techniques.
- Lubrication: Once reassembled, apply a few drops of mineral oil, 3-in-1 oil, or WD-40 to the pivot points and blades. This lubricates the moving parts and creates a protective barrier against rust.
By performing seasonal maintenance, you ensure your pruning tools are not only clean and sharp but also protected from corrosion, ready for optimal performance season after season.
Rust Prevention: Proactive Measures for Tool Longevity
Preventing rust is far easier and more effective than trying to remove it once it takes hold. Rust weakens metal, dulls blades, and can ultimately ruin your pruning tools. Implementing proactive rust prevention measures is a key aspect of How To Care For Pruning Tools.
Here are effective strategies to prevent rust:
- Keep Tools Dry: Always ensure your pruning tools are completely dry before storing them. Moisture is the primary catalyst for rust formation.
- Lubricate Regularly: As mentioned earlier, regular lubrication with oil creates a protective barrier against moisture and air, both of which contribute to rust.
- Proper Storage: Store your pruning tools in a dry location, away from direct moisture. Consider storing them in a tool shed, garage, or even indoors.
- Sand Bucket Storage: An interesting tip from experienced gardeners is to store pruning shears in a bucket of sand. Dry sand effectively wicks away moisture and helps keep blades clean and rust-free. Ensure the sand is kept dry for this method to be effective.
Despite your best efforts, rust may still appear, especially in humid climates or with heavy tool use. For minor surface rust, scrub it away with steel wool or a wire brush. For more significant rust buildup, consider using a wire brush attachment for a drill or specialized rust removal tools.
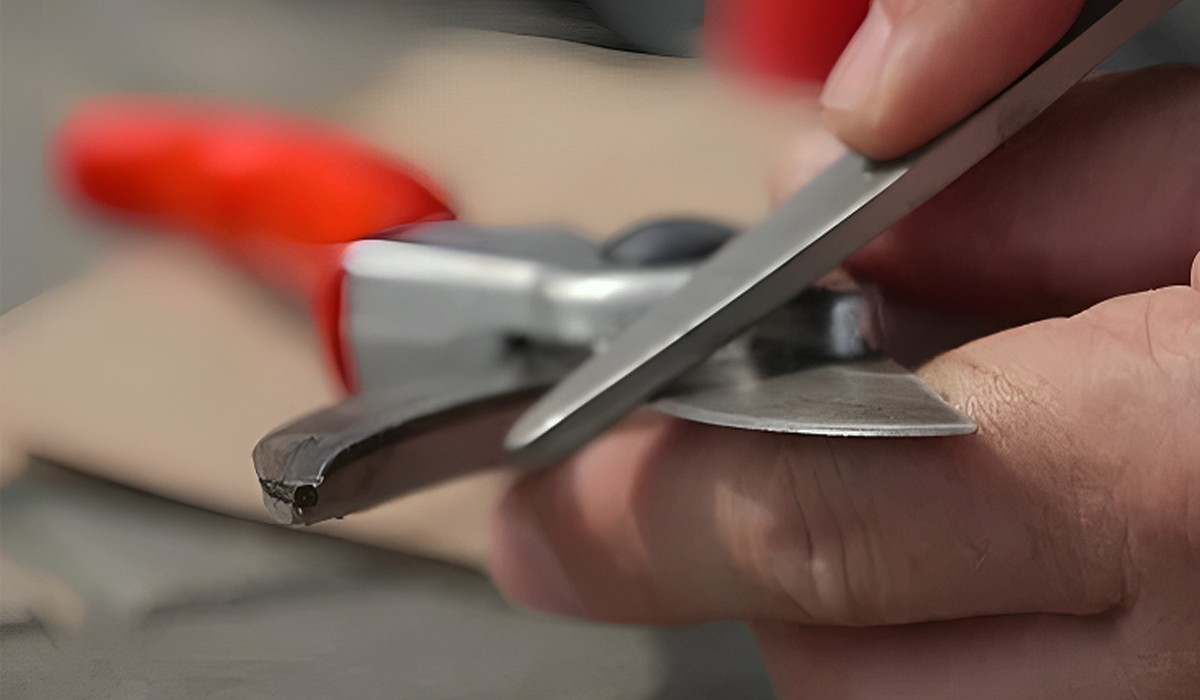 Close-up of hand cleaning pruning shears with steel wool and oil, demonstrating how to care for pruning tools and prevent rust.
Sharpening Pruning Shears: Maintaining Cutting Efficiency
Sharp pruning shears are not just easier to use; they are essential for plant health. Dull blades crush and tear plant tissue, leaving ragged cuts that are susceptible to pests and diseases. Regular sharpening is a vital part of pruning tool care.
To maintain optimal cutting performance, sharpen your pruning shears:
- Regularly: Sharpen your pruners before the start of each pruning season and periodically throughout, especially if you notice them becoming less efficient or tearing plant stems.
- During Extended Use: If you are engaged in a prolonged pruning session, take a break to re-sharpen your blades to maintain clean cuts.
Utilize sharpening tools like:
- Fine File: A versatile tool for sharpening various blade types.
- Sharpening Stone: Provides a honing action for a very sharp edge.
- Pruner Sharpener: Specialized sharpeners designed for the specific blade angle of pruning shears, often easier to use for beginners.
When sharpening, focus on the beveled edge of the blade, maintaining the original angle. Remove any burrs or rough edges from the flat side of the blade for a smooth, clean cut.
Blade Replacement: When to Swap Out Worn Blades
Even with diligent sharpening, pruning shear blades will eventually wear down, chip, or become damaged over time with frequent and intensive use. Knowing when to replace the blades is crucial for maintaining tool performance and avoiding plant damage.
Consider blade replacement if you observe:
- Chips or Cracks: Visible damage to the blade edge.
- Worn-Down Edge: The cutting edge becomes excessively rounded or loses its defined angle.
- Inability to Sharpen: If you find it increasingly difficult to achieve a sharp edge, or if the blade doesn’t hold an edge for long, replacement is likely necessary.
- Visible Wear and Tear: General signs of extensive wear and tear on the blades.
Some manufacturers, like Haus & Garten, offer cost-effective replacement parts for their pruning shears. Opting for replacement blades is often more economical and environmentally friendly than purchasing an entirely new pruner.
Adjusting the Bypass Mechanism: Fine-Tuning Performance
Over time and with heavy use, the bypass mechanism of your pruners can loosen, leading to blades that snag, jam, or don’t close cleanly. Fortunately, this issue is often easily rectified with a simple adjustment.
To address loose jaws and restore smooth operation:
- Tighten the Blade Nut: Locate the pivot bolt or nut that holds the blades together. Using a wrench or screwdriver, gently tighten this nut to reduce blade clearance and eliminate looseness. Avoid over-tightening, which can restrict blade movement.
- Blade Realignment: If the blade appears bent or misaligned, carefully realign it. Gentle taps with a hammer (protecting the blade with a cloth or wood block) can often straighten a slightly bent blade.
Regularly checking and adjusting the bypass mechanism ensures your pruners operate smoothly and efficiently.
Insider Tips for Pruning Tool Longevity
Beyond the fundamental maintenance steps, consider these insider tips to further extend the life of your pruning tools and enhance your gardening experience:
- Invest in Quality Steel Blades: Choose pruning tools with high-quality steel blades, ideally hardened or carbon steel. These blades hold an edge longer, resist wear, and are less prone to frequent sharpening.
- Ergonomic Design for Comfort: For extensive pruning tasks, opt for ergonomic pruners. Features like cushioned, anti-slip handles, angled blades, and shock absorption pads reduce hand fatigue and wrist strain, making pruning more comfortable and efficient, such as EnduroPRO garden shears.
- Functional Features Enhance Efficiency: Look for features like a sap groove to prevent blade stickiness and a wire-cutting notch to avoid blade damage when cutting wires or ties.
- Strong Spring Mechanism: A robust spring between the handles reduces hand fatigue during repetitive pruning. Choose pruners with a securely attached spring that can be detached for cleaning and maintenance.
- Lightweight Design Reduces Fatigue: Select lightweight pruners that fit comfortably in your hand to minimize fatigue, especially during prolonged pruning sessions.
- Disassemblable for Easy Cleaning: Opt for pruners that can be easily disassembled for thorough cleaning. This allows you to remove accumulated sap and debris from all parts, preventing sticking and corrosion.
- Choose Brands with Replacement Parts: Purchasing pruning tools from brands that offer replacement parts is a smart long-term investment. It allows you to replace worn or damaged components, extending the lifespan of your tools and saving you money on complete replacements.
By implementing these comprehensive care practices, you’ll ensure your pruning tools remain in peak condition, providing clean, efficient cuts for healthy plants and enjoyable gardening for years to come. Proper pruning tool maintenance is an investment in both your gardening success and the longevity of your valuable tools.