
Ensuring your HO scale slot car performs at its peak often comes down to the nuances of its pickup shoes. These tiny components are crucial for consistent power delivery and optimal handling on the track. Getting the “hangle” and tension just right is key, and fortunately, with the right Ho Scale Slot Car Tools and a systematic approach, you can dial in your car for maximum performance. Let’s dive into the process, step-by-step.
The foundation of any good slot car setup lies in consistency and repeatability, particularly when it comes to sprung, hard shoe slot cars. The goal of pickup shoe adjustment is to maximize the pre-load—the initial pressure on the rails—right up to the point just before the car begins to stutter or lose contact. This “sweet spot” optimizes current transfer and handling, ensuring neither performance overlap nor underlap. Keep in mind that this ideal setting can vary based on factors like wheel weight, axle and tire setups, added weights, and even tire and axle height. Each car requires individual attention and fine-tuning.
Step one, and arguably the most critical, is assessing the “hangle.” This term refers to the relationship between the pickup shoe’s contact patch and the chassis and rail. Think of it as your starting point – assuming it’s correct without checking is a common mistake. The pickup shoe must meet the rail perpendicularly, forming a ‘T’ shape.
If the contact patch doesn’t remain horizontal throughout its range of motion, it indicates a twisted shoe or, less commonly, a bent hanger bar. Correcting this misalignment is the first crucial step before any further adjustments.
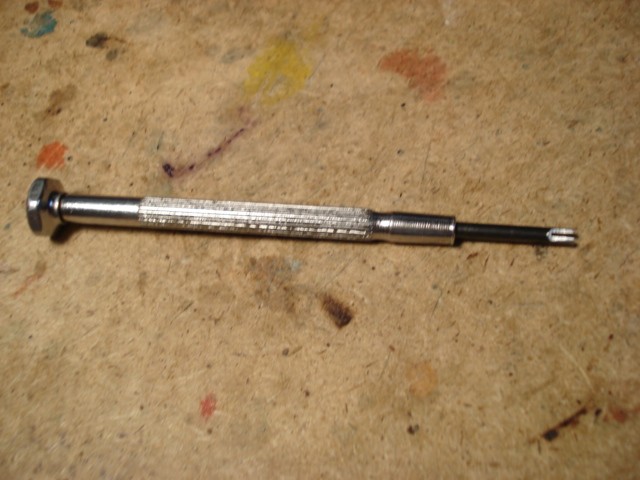
To make precise adjustments, investing in or crafting a dedicated ho scale slot car tool is essential. Tools like the Aurora Vibrator adjustment tool are purpose-built for this task and were once standard equipment for slot car enthusiasts.
For situations demanding extra finesse and force, smooth-jawed hemostats offer unparalleled surgical precision, making them an invaluable addition to your ho scale slot car tools collection.
Next, it’s time to “check the burn.” The burn mark on the pickup shoe contact patch tells you how the shoe is contacting the rail. If the burn is too far forward on the patch, the shoe is “toed-in,” meaning the heel needs to be lowered. Conversely, if the burn is too far back, it’s “heeled-in,” and the toe needs lowering. While some racers use crayons to darken the patch for better visibility, cleaning the patch after each burn test significantly improves readability. An Atlas rail block, or a similar cleaning method, is ideal for quickly prepping the pickup patch for inspection. A few quick scrubs, and you’re ready to read the burn.
With the contact patch now reasonably aligned, the next step is to assess your current tension setting. Let’s clarify the terminology used in pickup adjustment:
“Opening” the shoe hook means raising the pivot point of the hook. This increases the distance between the upper and lower spring perches, which in turn decreases the preload (the initial tension at the beginning of the shoe’s travel).
“Closing” the shoe hook lowers the pivot point, reducing the distance between the spring perches and increasing the preload.
Now, put your car on the track and power it up using the recommended voltage. Position yourself at track level, focusing on the pickups. Give the throttle a quick, full snap. Observe what happens:
A. Stuttering bunny hop start: The car jumps erratically or pops out of the slot immediately. This indicates excessive preload.
B. Anemic launch: The car starts weakly and sluggishly. This suggests insufficient preload.
C. Neither A nor B: The car launches smoothly and responsively.
If you observe scenario A (stuttering), you need to open the hook to lower the perch and reduce preload. If you see scenario B (anemic launch), close the hook to raise the perch and increase preload. If you experience scenario C, the goal is to incrementally raise the perch (close the hook) until the car just begins to stutter. Then, slightly ease back the adjustment by opening the hook just a touch until the stutter disappears.
If you overshoot or undershoot the adjustment, make small, incremental adjustments to the hook, opening or closing it until you find that sweet spot just before stuttering. Always remember to re-check the “hangle” after making any hook adjustments. In fact, a quick glance at the “hangle” should become a routine check every time you pick up your car.
Finally, test the car’s launch at various points around the track. Tracks with inconsistent voltage, often due to inadequate power taps from toy-grade power supplies, might cause stuttering only at the feeder section. This is also a good time to re-examine the burn mark and make any necessary minor adjustments.
Adjusting ho scale slot car pickups isn’t complex; it’s a simple, iterative process. With practice, this sequence of checks and adjustments will become second nature. Soon, you’ll be able to place a new car on the track, quickly assess its launch, and instantly know whether to open or close the hook to achieve peak performance.