
The check engine light. Just the sight of it illuminated on your dashboard can send shivers down a car owner’s spine. Is it a minor hiccup, or a sign of impending automotive doom? Fortunately, in today’s world of automotive technology, deciphering the mystery behind that glowing light is more accessible than ever, thanks to car diagnostic tools. This comprehensive guide will walk you through how to use a car diagnostic tool to understand your check engine light, empowering you with knowledge and saving you potentially costly trips to the mechanic for a simple diagnosis.
Understanding the Check Engine Light and Why It’s On
The check engine light, also known as the malfunction indicator lamp (MIL), is part of your vehicle’s onboard diagnostics system (OBD-II). This sophisticated system constantly monitors various aspects of your car’s engine and emissions systems. When it detects an issue outside of normal parameters, it illuminates the check engine light to alert you.
The reasons for a check engine light to activate are vast and varied, ranging from minor issues like a loose gas cap to more significant problems such as a faulty catalytic converter or engine sensor. Ignoring the check engine light is never advisable. While it might sometimes indicate a minor, temporary issue, it could also be a warning sign of a problem that can worsen over time, leading to reduced fuel efficiency, increased emissions, or even engine damage.
Step-by-Step Guide: Using a Car Diagnostic Tool to Check Your Engine Light
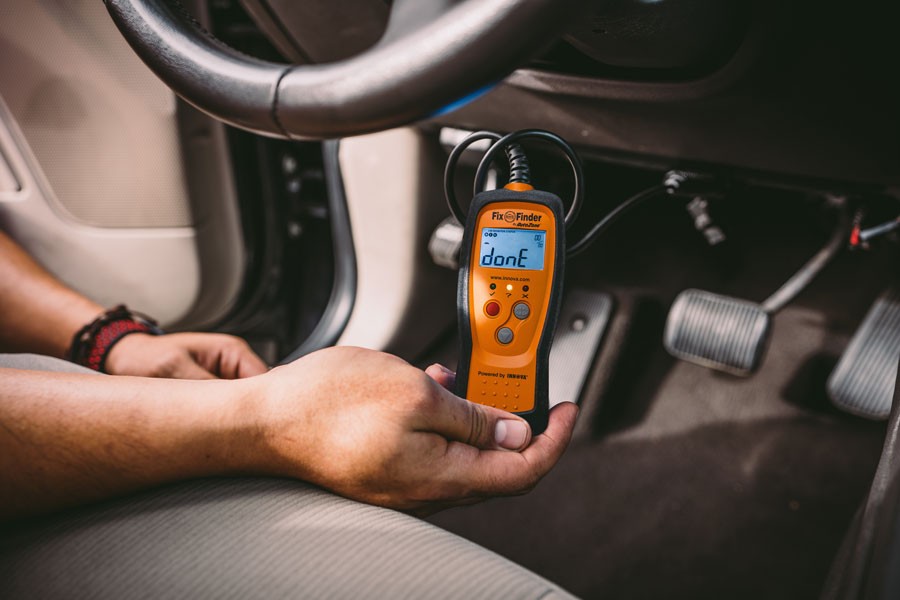
Using a car diagnostic tool is a straightforward process. For this guide, we’ll focus on using a readily available OBD-II scanner, similar to the Fix Finder tool provided at automotive parts stores. Here’s how to do it:
1. Prepare Your Vehicle
Before you begin, ensure your vehicle is safely parked and completely turned off. Engage the parking brake for added safety. Familiarize yourself with the location of your vehicle’s Data Link Connector (DLC). This is a standardized 16-pin port, usually located under the dashboard on the driver’s side. If you’re unsure, consult your vehicle’s owner’s manual for the exact location.
2. Connect the Car Diagnostic Tool
Take your OBD-II scanner and locate the DLC port in your vehicle. The connector on the scan tool is designed to fit only one way into the DLC, so you don’t need to worry about incorrect insertion. Gently plug the scan tool connector into the DLC port until it is firmly seated.
 Connecting OBD2 scanner to car DLC port
3. Turn on the Ignition (Without Starting the Engine)
Once the scan tool is connected, turn your ignition key to the “ON” position. This will power up your vehicle’s electrical system and allow the scan tool to communicate with the car’s computer. Important: Do not start the engine at this stage. Simply turn the key to the position just before engine ignition.
4. Initiate the Scanning Process
The car diagnostic tool will automatically begin to establish a connection with your vehicle’s computer system. Depending on the specific scan tool model, you may need to navigate a simple menu on the tool’s LCD screen. Look for options like “Read Codes” or “Diagnostic Scan” and follow the on-screen prompts. The scan tool will then communicate with your car’s computer to retrieve any stored diagnostic trouble codes (DTCs). This process typically takes only a few seconds.
5. Retrieve and Record Vehicle Information (If Required)
Some scan tools may prompt you to enter your vehicle’s information, such as year, make, model, and engine type, before or after scanning. Have this information readily available. Note down your vehicle’s mileage as well, as this can sometimes be relevant for diagnostics.
6. Review the Diagnostic Trouble Codes (DTCs)
Once the scan is complete, the diagnostic tool will display any DTCs that it has retrieved from your vehicle’s computer. These codes are typically alphanumeric (e.g., P0171, C1234) and are standardized across the automotive industry. Record these codes accurately. Many scan tools will also provide a brief description of the code directly on the screen.
7. Understand the Scan Tool Indicators
Many OBD-II scanners come equipped with indicator lights, often LEDs, to provide a quick visual assessment of your vehicle’s system status. These may include:
- Green LED (or Checkmark): Indicates that all engine systems are currently operating within normal parameters. No DTCs are present, and all monitors are active and completing their diagnostic tests.
- Yellow LED (or Question Mark): Suggests that some monitors have not yet completed their self-testing, or there might be a “pending” DTC in the system. A pending code means a potential issue has been detected, but it hasn’t yet triggered a permanent DTC or the check engine light. Completing a full drive cycle and rescanning may be recommended.
- Red LED (or “X”): Signals a problem with one or more of the vehicle’s systems. A red light indicates the presence of one or more DTCs, and the check engine light on your dashboard is likely illuminated.
Troubleshooting Common Scan Tool Issues
While car diagnostic tools are generally user-friendly, you might encounter a few common issues:
- No Power to Scan Tool (Blank LCD): If the scan tool’s screen remains blank when connected, check your vehicle’s DLC for power. A blown fuse in your vehicle’s fuse panel is a common culprit. Consult your owner’s manual to locate the fuse related to the OBD-II system or PCM (Powertrain Control Module) and replace any blown fuses. If fuse replacement doesn’t resolve the issue, further electrical system diagnosis may be necessary.
- No Codes Found: In some cases, the scan tool may report “No Codes Found” even with a check engine light illuminated. This could indicate a manufacturer-specific issue that the generic OBD-II scan tool might not detect. Dealership-level diagnostic tools may be required for these situations.
- Connector Fit Issues: If you are unable to connect the scan tool connector to your vehicle’s DLC, it’s possible your vehicle is older than the standardized OBD-II protocol (generally vehicles manufactured before 1996). Older vehicles may require different diagnostic equipment.
Interpreting Diagnostic Trouble Codes and Next Steps
Once you have retrieved the DTCs, the next crucial step is to understand what they mean. While some scan tools offer basic code descriptions, for a more in-depth understanding, you’ll need to consult a reliable DTC resource. Websites like OBD-Codes.com or the AutoZone website provide comprehensive information on DTCs, including possible causes, symptoms, and potential fixes.
After identifying the potential issue based on the DTC, you have several options:
- DIY Repair (If Comfortable and Qualified): For simple issues like a loose gas cap (often indicated by EVAP system codes) or a faulty sensor that you can confidently replace, you might choose to perform the repair yourself.
- Consult a Professional Mechanic: For more complex issues or if you are unsure about diagnosing or repairing the problem yourself, it’s always best to consult a certified mechanic. Provide them with the DTCs you retrieved to help them quickly understand the potential area of concern.
- Visit an Auto Parts Store for Assistance: Stores like AutoZone offer free check engine light scanning services. Their knowledgeable staff can help you understand the DTC report and recommend possible solutions or parts if needed.
Conclusion
Using a car diagnostic tool to check your check engine light is a valuable skill for any car owner. It empowers you to understand your vehicle’s health, make informed decisions about maintenance and repairs, and potentially save money on unnecessary diagnostic fees. While a car diagnostic tool provides valuable insights, remember that it is a diagnostic aid. Always prioritize safety and consult with qualified professionals when dealing with vehicle repairs, especially for complex issues. By taking a proactive approach to understanding your check engine light, you can ensure your vehicle remains reliable and on the road for years to come.
FAQs
1. What does it mean if the scan tool shows a red “X”?
A red “X” indicates that the scan tool has detected one or more Diagnostic Trouble Codes (DTCs), meaning there is a problem with your vehicle that requires attention. You should investigate the specific DTCs to understand the nature of the issue.
2. Can I use a car diagnostic tool to reset the check engine light?
Yes, many car diagnostic tools have the ability to clear DTCs and reset the check engine light after a repair has been made. However, simply clearing the code without addressing the underlying issue will only result in the light turning back on if the problem persists.
3. Is it safe to drive with the check engine light on?
It depends on the nature of the problem. If the check engine light is flashing, it indicates a more serious issue that could potentially cause engine damage, and you should avoid driving and seek immediate professional attention. If the light is on but steady, it’s generally safer to drive short distances to get the vehicle checked, but it’s still important to diagnose and address the problem as soon as possible.
4. Where can I get a car diagnostic tool?
Car diagnostic tools are widely available online and at automotive parts stores like AutoZone. They range in price from basic code readers to more advanced professional-grade scanners.
5. Do all car diagnostic tools work on all vehicles?
Most car diagnostic tools that comply with the OBD-II standard are compatible with vehicles manufactured from 1996 onwards in the United States (and similar standards in other regions). However, always check the tool’s compatibility specifications to ensure it works with your specific vehicle year, make, and model.
[