
Removing your car’s dashboard might seem daunting, but with the right approach and tools, it’s a manageable DIY task. Whether you’re replacing a cracked dash, upgrading your car audio system, or accessing components behind the panel, having the right Car Dashboard Removal Tool is crucial. This guide provides a step-by-step walkthrough based on a real dashboard removal experience, ensuring you can confidently tackle this project.
Before you begin, preparation is key. Gather all the necessary tools to ensure a smooth and efficient removal process. Using specialized car dashboard removal tools can prevent damage to your vehicle’s interior and make the job significantly easier.
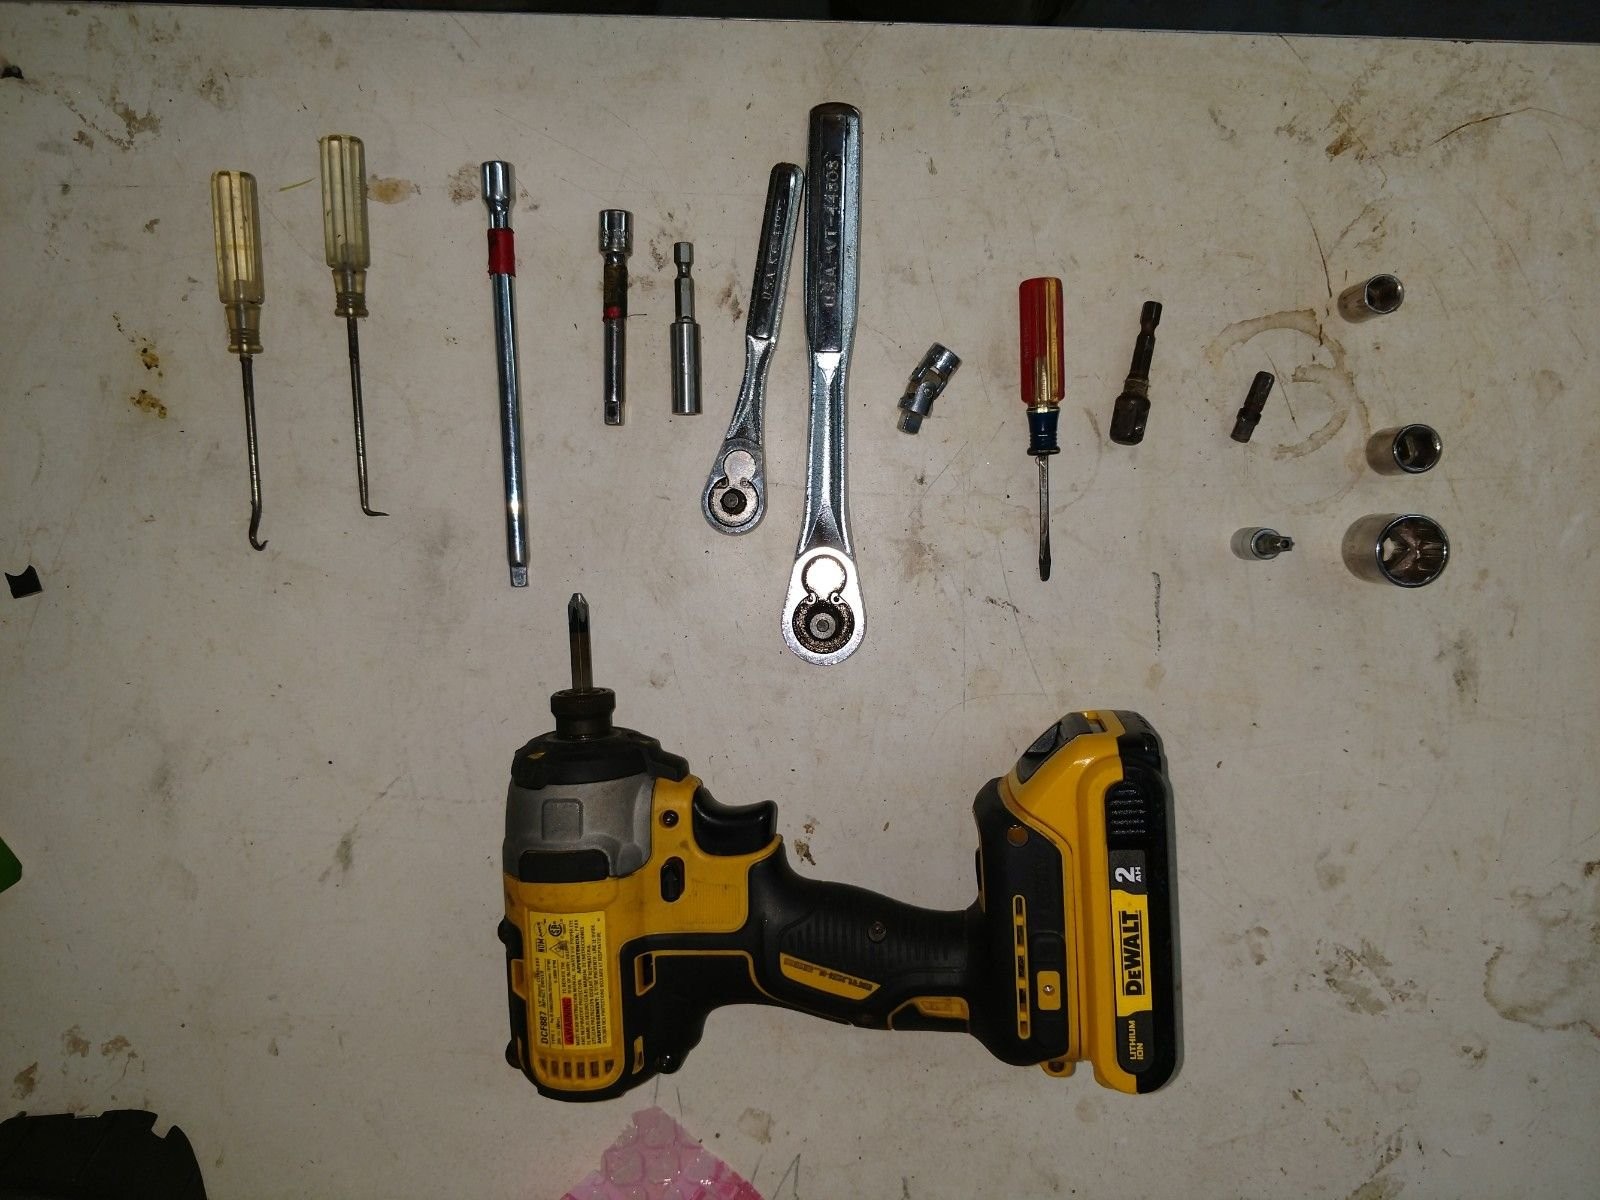
Here’s a list of tools you’ll need for most dashboard removals:
- Various pry tools or trim removal tools: These are essential car dashboard removal tools made of plastic or nylon to prevent scratching and damage to delicate trim pieces.
- Socket wrench set with 10mm, 12mm, and 19mm sockets: These will be used to remove various bolts and nuts securing the dashboard.
- Torx 30 Security bit: This specialized bit is often required to remove airbag components and is indispensable for safe dashboard removal. Standard Torx bits will not work on security Torx screws.
Let’s dive into the dashboard removal process, starting with the driver’s side:
-
Initial Setup and Tool Check: Ensure you have all the listed car dashboard removal tools ready and within reach. Familiarize yourself with their purpose.
-
Steering Wheel Removal Preparation: Note that while this overview image doesn’t show steering wheel removal, it’s a necessary step. Steering wheel removal is detailed in the subsequent steps.
-
Starting the Disassembly: Begin carefully prying off trim pieces around the dashboard using your car dashboard removal tool kit. Apply gentle, even pressure to avoid breaking any plastic components.
-
Continuing Trim Removal: Systematically work your way around the dashboard, using different pry tools from your kit as needed to access various clips and fasteners.
-
Accessing Fasteners: As trim panels are removed, you’ll start to expose screws and bolts. Keep track of each fastener and where it belongs for reassembly.
-
Component Separation: Disconnect any electrical connectors or wiring harnesses as you remove dashboard sections. Remember to handle connectors gently to avoid damage.
-
Reaching Deeper Fasteners: Continue removing layers of trim to get to deeper set screws and bolts that secure the main dashboard structure.
-
Center Console Area: Focus on removing trim around the radio and center console area. This often requires careful prying with your car dashboard removal tool.
-
Behind the Radio and Cluster: This is the view after removing the radio face and instrument cluster lid. This exposes more of the dashboard structure and fasteners.
-
Gauge Cluster Bolts: Access and remove the bolts holding the gauge cluster in place. These are usually located after removing surrounding trim pieces.
-
Behind Gauge Cluster View: Another view behind the gauge cluster area, showing wiring and connections that need to be carefully disconnected.
-
Disconnecting Gauge Cluster: Unplug the electrical clips connected to the gauge cluster to fully detach it from the dashboard.
-
Gauge Cluster Removed: With the clips disconnected, the gauge cluster can be removed, providing more access behind the dashboard.
-
Lower Dashboard Bolts: Locate and remove bolts situated in the lower sections of the dashboard, often near the footwells.
-
Side Panel Removal: Remove side panels that might be attached to the dashboard structure. These are often held by clips and can be gently pried off using a car dashboard removal tool.
-
Steering Column Covers: Remove the plastic covers around the steering column to access the steering wheel and related components.
-
Steering Wheel Bolt Access: This view shows access to the steering wheel bolt after removing the steering column covers.
-
Airbag Security Torx Bits: Locate the Torx 30 security bits, often covered by plastic caps. These are essential for safely removing the airbag.
-
Airbag Removal: Use the Torx 30 security bit to remove the airbag. Carefully slide the airbag straight out after removing the screws.
-
Post-Airbag Removal: View after the airbag has been removed, exposing the steering wheel nut.
-
Steering Wheel Nut Removal: Use a 19mm socket to remove the central nut holding the steering wheel. The wheel should then slide straight off.
-
Steering Column Screws: After removing the steering wheel, locate and remove Phillips head screws on either side of the steering column. These might be covered by plastic caps.
-
Harness Cover Lid Removal: Step 35 in some guides might instruct to remove the entire harness cover. However, often just removing the lid provides sufficient access to the gauge cluster bolts. Use your car dashboard removal tool to carefully pry open the lid.
-
Accessing Gauge Cluster Bolts: With the harness cover lid removed, you should now have access to the four bolts securing the gauge cluster.
-
Gauge Cluster Bolt Locations: Close-up view of the bolts that need to be removed to release the gauge cluster.
-
Removing Gauge Cluster Bolts: Use your socket wrench to remove these four bolts, freeing the gauge cluster.
-
Gauge Cluster Wiring Clips: Unplug these two clips to fully disconnect the gauge cluster before removing it completely.
-
Unplugging Gauge Cluster Clips: Carefully unplug the mentioned clips to finalize the gauge cluster removal process.
-
Gauge Cluster Area After Removal: This is the dashboard view after the gauge cluster has been completely removed.
-
Further Dashboard Disassembly: Continue removing any remaining screws and trim pieces on the driver’s side of the dashboard.
-
Moving to Passenger Side: Now, shift your focus to the passenger side of the dashboard to continue the removal process.
-
Passenger Side Initial Disassembly: Begin by removing trim panels and components on the passenger side, similar to the driver’s side approach.
-
Passenger Side Focus: Starting passenger side dashboard trim removal.
-
Glove Box Area: Focus on the glove box area, as trim panels here often need to be removed to access dashboard fasteners.
-
Vent Trim Removal: Remove trim pieces around the air vents on the passenger side using your car dashboard removal tool.
-
Defroster Vent Removal: Defrost vents often simply pop out using a pry tool. Gently lift along the front edge to release them.
-
Defrost Vent Removal in Action: Pry tool being used to remove the defrost vents from the dashboard.
-
Post Defrost Vent Removal: Dashboard after the defrost vents have been removed, showing access to deeper components.
-
Vent Sensor Unclipping: Be sure to unclip any sensors connected to the vents. There’s typically one sensor in each vent.
-
Sensor Unclipping Detail: Close-up showing the process of unclipping sensors from the dashboard vents.
-
Airbag Plug and Bolt Location: Step 46 and 47 in some diagrams refer to a large yellow airbag plug and a 10mm bolt that need to be addressed on the passenger side.
-
Gauge Cluster Opening Screws: This diagram notes screws on both sides of the gauge cluster opening, and a lower screw and bolt on the left side, which might not be immediately obvious.
-
Hidden Bolt Location: A second, unlisted bolt located low on the left side of the dashboard structure. Ensure you find and remove all such hidden fasteners.
-
Dashboard Sliding Out: With all fasteners removed, the dashboard should now slide out. Remember to disconnect wire clips in the driver’s side A-pillar.
-
A-Pillar Wire Clip Removal: Wires are clipped into the metal A-pillar. Remove the tabs from the A-pillar to allow the wire to come out with the dashboard.
-
Speaker Grill Removal: Pop out the speaker grill from the front of the dashboard. This is usually one of the final steps before full removal.
-
Dashboard Completely Removed: Congratulations, the dashboard is now completely removed! You have successfully navigated the process using the right car dashboard removal tools and this guide.
By following these steps and utilizing the correct car dashboard removal tools, you can confidently remove your car’s dashboard. Remember to take your time, be gentle with trim pieces, and keep track of all removed fasteners for a successful reinstallation. Good luck!