
For auto repair professionals and car enthusiasts, the ability to accurately adjust or correct a vehicle’s odometer is a valuable skill. Initially, my journey into this area began with a specific challenge: repairing Prius combination meters, known for their “blank speedometer” issue. Once I mastered that, the next logical step was odometer programming for exchange units. While I already possessed a tool for mileage correction across many vehicles – a user-friendly, menu-driven device – it proved ineffective for the Toyota Prius. This limitation sparked a deeper investigation into the intricacies of odometer correction, particularly for vehicles like the Prius, and what constitutes the best approach and tools for the job across a wider range of cars.
Driven by this challenge, I ventured into the realm of direct hex code editing, utilizing an EEPROM reader I had acquired for a previous project. My initial, somewhat naive, approach was to find a combination meter with a known mileage, convert that mileage to hexadecimal, and then locate and modify that data within the EEPROM dump. However, the reality of odometer data storage and correction turned out to be significantly more complex.
Unraveling Odometer Data Storage in the Toyota Prius
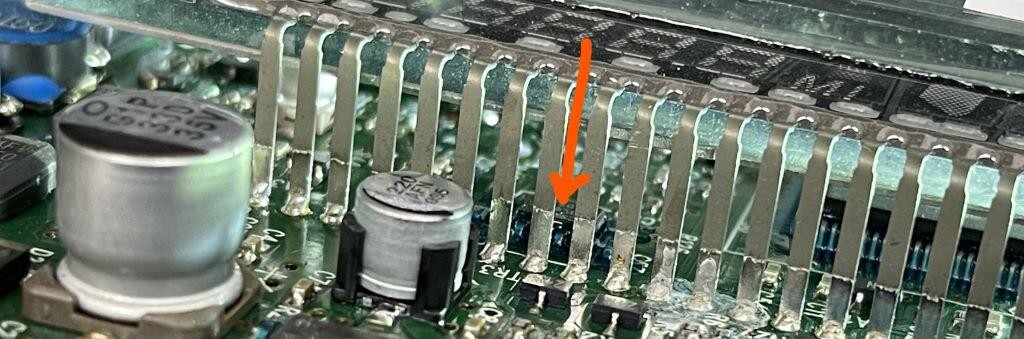
The Toyota Prius combination meter stores crucial data, including the odometer reading, within a 93C66 EEPROM chip. This chip is conveniently situated beneath the LCD screen, which is attached to the circuit board with numerous through-hole pins. Accessing this EEPROM requires patience and careful work, especially when desoldering the LCD – a task that can be quite time-consuming. After removing the LCD, the next hurdle is removing the solder mask from the 93C66 chip’s pins, adding another layer of complexity to the process.
The initial assumption might be that the 93C66 chip’s pins connect to easily accessible test pads on the board’s back. However, determining these connections necessitates direct access to the chip and verification with an ohmmeter. This hands-on exploration is crucial for understanding the physical interface for data manipulation.
Decoding Prius Odometer Data in Hexadecimal
The odometer reading in a Prius is encoded in a 4-digit hexadecimal format. This might seem insufficient given that a 4-digit hex code can only represent up to 65,535 (FFFF) in decimal. Toyota’s approach involves multiplying this 4-digit hex code by 17 to arrive at the actual mileage. For instance, the hex code 1673 (decimal 5,747) translates to 97,699 miles (17 x 5,747).
Interestingly, the system repeats this hex code 17 times within the EEPROM data. Therefore, a mileage of 97,699 would be represented as a sequence of seventeen “1673” hex values. This redundancy might be for data integrity or error checking.
However, mileage doesn’t always fall neatly into multiples of 17. Consider a scenario where the desired mileage is 97,700. Incrementing the hex code from 1673 (decimal 5747) to 1674 (decimal 5748) results in a mileage of 97,716 (17 x 5748), overshooting by 16 digits. This discrepancy highlights that the odometer must increment in units of 1, not 16.
The solution lies in a combination of hex codes. As illustrated in the data above, a mix of 1673 and 1672 is used. If 1673 is repeated 10 times and 1672 is repeated 7 times, the calculation is as follows:
- 1673 (decimal 5747) x 10 = 57,470
- 1672 (decimal 5746) x 7 = 40,222
Adding these together (57,470 + 40,222) yields 97,692, which closely reflects the intended mileage. The system reads these larger numbers from left to right and top to bottom, much like standard reading order.
The “Mask” and Its Role in Odometer Correction
Simply altering combinations of 17 hex codes doesn’t guarantee single-digit odometer increments. While mileage changes might occur, they are often not in the desired single-unit steps. Through experimentation, it became apparent that another factor is at play – what I termed the “mask.”
The “mask” comes into effect when one of the 17 hex code spaces is replaced with a value one greater than the original. In such instances, a corresponding location within the “mask” – a 17-space section immediately following the odometer data – changes from 0000 to FFFF. This “mask” mechanism likely plays a crucial role in how the system interprets and displays mileage increments.
Essential Tools and Techniques for Prius Odometer Correction
To effectively write to the Prius combination meter EEPROM and perform odometer correction, specialized tools are necessary. An EEPROM reader/writer is indispensable. Affordable options like XGecu EEPROM programmers, available from platforms like EBay and Amazon, offer a cost-effective entry point. While these may require some technical aptitude and online resources like YouTube tutorials to navigate their software and operation, they provide a functional solution. For users seeking more automotive-specific tools with guided instructions, companies like Andromeda Research Labs offer more tailored solutions.
Initially, direct soldering wires to test points on the board for EEPROM programmer connection was employed. Jumpers to an adapter streamlined the process compared to accessing the chip behind the LCD.
To further enhance efficiency, a pogo pin adapter was created from a modified screwdriver handle. Precision drilling (.100″ spacing) accommodates spring-loaded pogo pins, readily available on platforms like Amazon or EBay. This pogo pin adapter approach significantly accelerates setup for in-circuit programming.
The development of various adapters for both in-circuit and out-of-circuit programming underscores the iterative process of refining efficient odometer correction techniques. While initial setup for a specific chip might take longer, subsequent jobs benefit from the streamlined adapter setup.
Verifying Odometer Correction Results on the Bench
Before reinstalling the combination meter, bench testing is crucial to validate the mileage correction. This requires a pinout diagram. Applying 12V+ to pin 22 and 12V- to pin 14 should power the meter and display the mileage. However, bench testing speedometer and odometer functionality is limited. While a 5V square wave applied to pin 9 can simulate a speed signal, actual speedometer movement requires the car to be “in gear” – a signal typically communicated via the vehicle’s network (BEAN in the Prius) and beyond the scope of simple bench testing without deeper network simulation capabilities.
Expanding Beyond Prius: Choosing the Best Odometer Correction Tool for All Cars
While this exploration focused on the Prius, the principles of odometer correction extend to a wide array of vehicles. The “Best Odometer Correction Tool For All Cars” is not a single device, but rather a suite of tools and knowledge tailored to different vehicle makes and models. For modern vehicles, OBD-II based tools are becoming increasingly prevalent, offering easier access to odometer data through the diagnostic port. However, for older or more complex systems, direct EEPROM manipulation, as detailed for the Prius, might still be necessary.
Choosing the right tool involves considering factors like:
- Vehicle Compatibility: Does the tool support the specific make, model, and year of the vehicle?
- Functionality: Does it offer features beyond basic mileage correction, such as EEPROM reading/writing, diagnostic functions, or key programming?
- Ease of Use: Is the software user-friendly, with clear instructions and reliable performance?
- Support and Updates: Does the manufacturer provide adequate technical support and software updates to maintain compatibility with newer vehicles?
Ultimately, the best approach often involves a combination of tools and techniques. Understanding the underlying data storage methods, whether EEPROM-based or accessible via OBD-II, is paramount. For professionals, investing in a range of high-quality tools and staying updated with the latest automotive technologies is essential to effectively address odometer correction needs across “all cars.”
If you’ve followed this detailed guide, you are well-equipped to embark on your own odometer correction endeavors, starting perhaps with the intricacies of the Toyota Prius. Good luck!
Further Resources:
- A misadventure with a Subaru immobilizer system and keyless entry
- Northridge Fix YouTube channel for micro-soldering techniques.
- A story of fixing the unfixable Prius transmission.
- Repairing a Toyota Hybrid inverter.