
Avast Recovery Disk is a powerful tool that can save your PC from even the most persistent malware infections. When standard antivirus scans fail, this bootable disk allows you to scan your system in a clean environment, increasing the chances of detecting and eliminating threats. This comprehensive guide will walk you through creating, using, and understanding the benefits of Avast Recovery Disk.
What is Avast Recovery Disk and Why You Need It
Sometimes, malware digs deep into your system, making it difficult for regular antivirus software to remove. Avast Recovery Disk provides a solution by booting your PC from a separate, clean environment – either a USB drive or a DVD. This isolates the malware, preventing it from interfering with the scan and allowing Avast to effectively neutralize the threat. This is particularly useful when malware prevents your operating system from starting normally.
Creating Your Avast Recovery Disk
Before you begin, you’ll need:
- A malware-free Windows PC: This computer must have Avast Antivirus installed.
- A blank USB drive (2GB or larger) or a blank DVD: Choose the media you prefer for your recovery disk. For DVDs, you’ll also need a DVD writer and burning software.
Steps to create Avast Recovery Disk:
- Open Avast Antivirus: Launch Avast on your clean PC.
- Navigate to Rescue Disk: Go to
Protection->Virus Scans->Rescue Disk. - Choose UEFI or BIOS: Select the appropriate boot option for your infected PC. UEFI is generally used in computers manufactured after 2005. Check your PC’s documentation if you’re unsure.
- Create on USB or Create ISO: Choose to create the recovery disk on a USB drive by selecting “Create on USB” and choosing your drive from the list. Alternatively, create an ISO file to burn onto a DVD by selecting “Create ISO file”. For DVDs, save the ISO, open the folder, right-click the file, and choose “Burn disc image.”
Booting Your PC from Avast Recovery Disk
- Insert the Recovery Disk: Plug in the USB drive or insert the DVD into your infected PC.
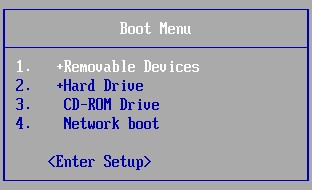
- Access the Boot Menu: Turn on your PC and immediately press the designated key to enter the Boot Menu (often Esc, F12, F11, but can vary depending on your PC manufacturer). Look for instructions on your PC’s startup screen.
- Select Your Boot Device: Choose your USB drive or DVD from the Boot Menu. It might be listed as “Removable Devices,” “USB Storage Device,” or “CD-ROM Drive.”
- Confirm Boot: Follow the on-screen prompts to confirm booting from the selected device.
Scanning and Removing Malware
- Launch AvastPE Antivirus: Once the Rescue Disk loads, click the AvastPE Antivirus icon.
- Update Virus Definitions: Ensure your definitions are up-to-date by clicking “Update VPS” if you have an internet connection.
- Scan Your PC: Choose to scan all hard disks or specific folders. You can also opt to scan all archives (compressed files).
- Review Scan Results: After the scan, Avast will display a report of any found threats.
Repairing or Deleting Infected Files
- Choose Fix Automatically or Fix Manually: “Fix Automatically” attempts to repair infected files and automatically deletes those that can’t be fixed. “Fix Manually” lets you choose actions for each detected threat.
- Apply Actions: If choosing “Fix Manually,” select the desired action (repair, delete) for each file.
- Restart Your PC: Once the actions are complete, restart your PC from the Rescue Disk menu (
File->Restart). Remove the USB drive or DVD.
Conclusion
Avast Recovery Disk is a vital tool for combating stubborn malware and ensuring your PC’s security. By following these steps, you can create your own recovery disk and use it to effectively remove threats that conventional antivirus scans may miss. This powerful utility can be a lifesaver when your system is compromised and needs a deep clean.