A multimeter is an essential tool for any car enthusiast or mechanic. It allows you to diagnose electrical issues by measuring voltage, resistance, and current (amps). While measuring voltage and resistance are common tasks, understanding how to measure Amps On A Multimeter requires a bit more care and knowledge. This guide will provide a comprehensive overview of how to safely and effectively measure amps using a multimeter.
Why Measure Amps?
Measuring current, often referred to as amperage (amps), is less common than voltage or resistance checks. Most circuits either function correctly or fail completely. Failures typically stem from a lack of voltage, a broken circuit (lack of continuity), or a faulty component. However, measuring amps becomes crucial when diagnosing parasitic drains that deplete your car battery. A parasitic drain occurs when a component continues to draw power even when the car is off.
How to Measure Amps: A Step-by-Step Guide
Measuring current differs significantly from voltage or resistance measurements. Crucially, current is measured with the circuit powered on and the multimeter connected in series with the entire circuit. This means all the current flows through the meter, much like a water meter measures water flow in a house.
Here’s how to configure your multimeter for current measurement:
-
Black Probe to COM: As with all multimeter measurements, connect the black probe to the “COM” (common) socket.
-
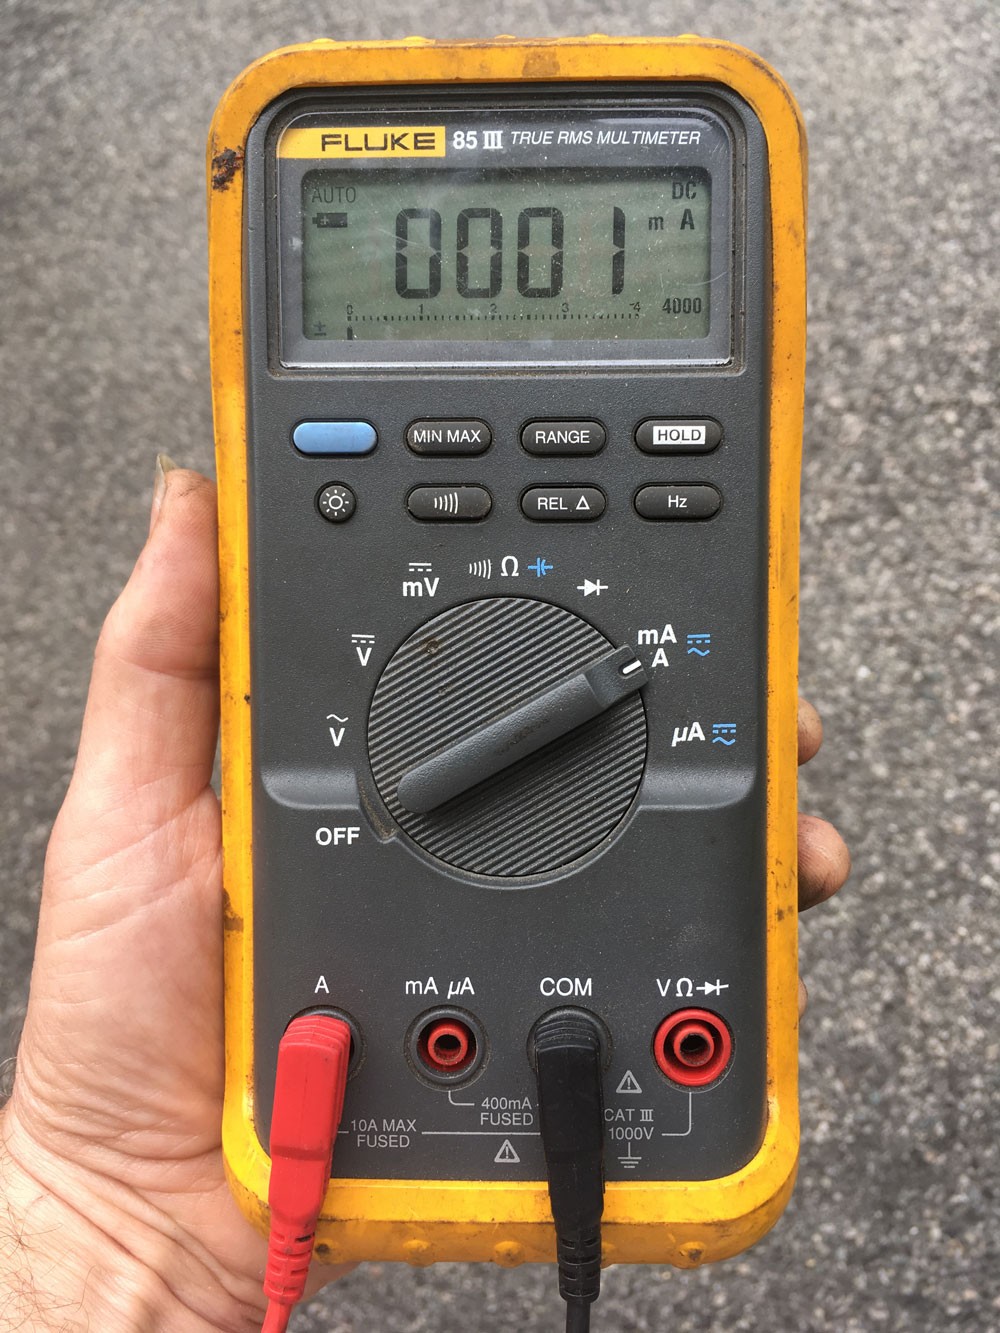
Red Probe to Amperage Socket: Connect the red probe to the socket labeled “A” (Amperage). Most multimeters have two amperage sockets:
- High Amperage (10A): For larger currents.
- Low Amperage (mA or µA): For smaller, more sensitive measurements (milliamps or microamps). When in doubt, start with the higher amperage setting.
-
Select Amperage Setting on the Dial: Rotate the dial to the amperage setting corresponding to the socket you’re using (A or mA). Consult your multimeter’s manual for specific instructions.
Important Safety Precautions:
-
Turn off the power before connecting the meter. This prevents accidental shorts and potential damage to the meter or circuit.
-
Use alligator clips instead of pointy probes. Alligator clips distribute the electrical load over a larger area, reducing the risk of overheating and micro-welding.
-
Connect the meter on the ground side of the circuit whenever possible. This minimizes the risk of a dead short if you accidentally touch a probe to ground.
Diagnosing Parasitic Drains
The primary use for measuring amps in automotive diagnostics is to identify parasitic drains. To measure the total current draw, connect the multimeter between the negative battery terminal and the car’s body.
Modern Car Considerations:
Modern cars with numerous control modules present challenges when diagnosing parasitic drains:
- Modules can take time to go to sleep: Control modules may remain active for several minutes after the car is off.
- Multiple fuse connections: Modules can be connected to multiple fuses, complicating the traditional method of pulling fuses to isolate the drain.
Using a Battery Disconnect Switch:
A battery disconnect switch simplifies the process:
- Connect the meter across the disconnect switch (between the negative battery post and ground) with the switch closed and the battery connected.
- Open the switch to force all current through the meter without interrupting power to the modules. This allows them to go to sleep.
- Switch to the lower amperage setting if needed, without resetting the modules.
Conclusion
Measuring amps on a multimeter is a powerful diagnostic technique, especially for identifying parasitic battery drains. By understanding the correct procedures and safety precautions, you can effectively use your multimeter to troubleshoot and repair automotive electrical problems. Remember to always consult your multimeter’s manual for specific instructions and safety guidelines.