
Taking care of your nails at home can be a relaxing and rewarding experience. Many people find that DIY manicures are not only more convenient and affordable but also a great way to maintain healthy and beautiful nails. If you’re new to at-home nail care, understanding how to use the right tools is key to achieving salon-quality results. This guide will walk you through the essential nail care tools and how to use them effectively for a perfect manicure every time.
Essential Nail Care Tools and How to Use Them
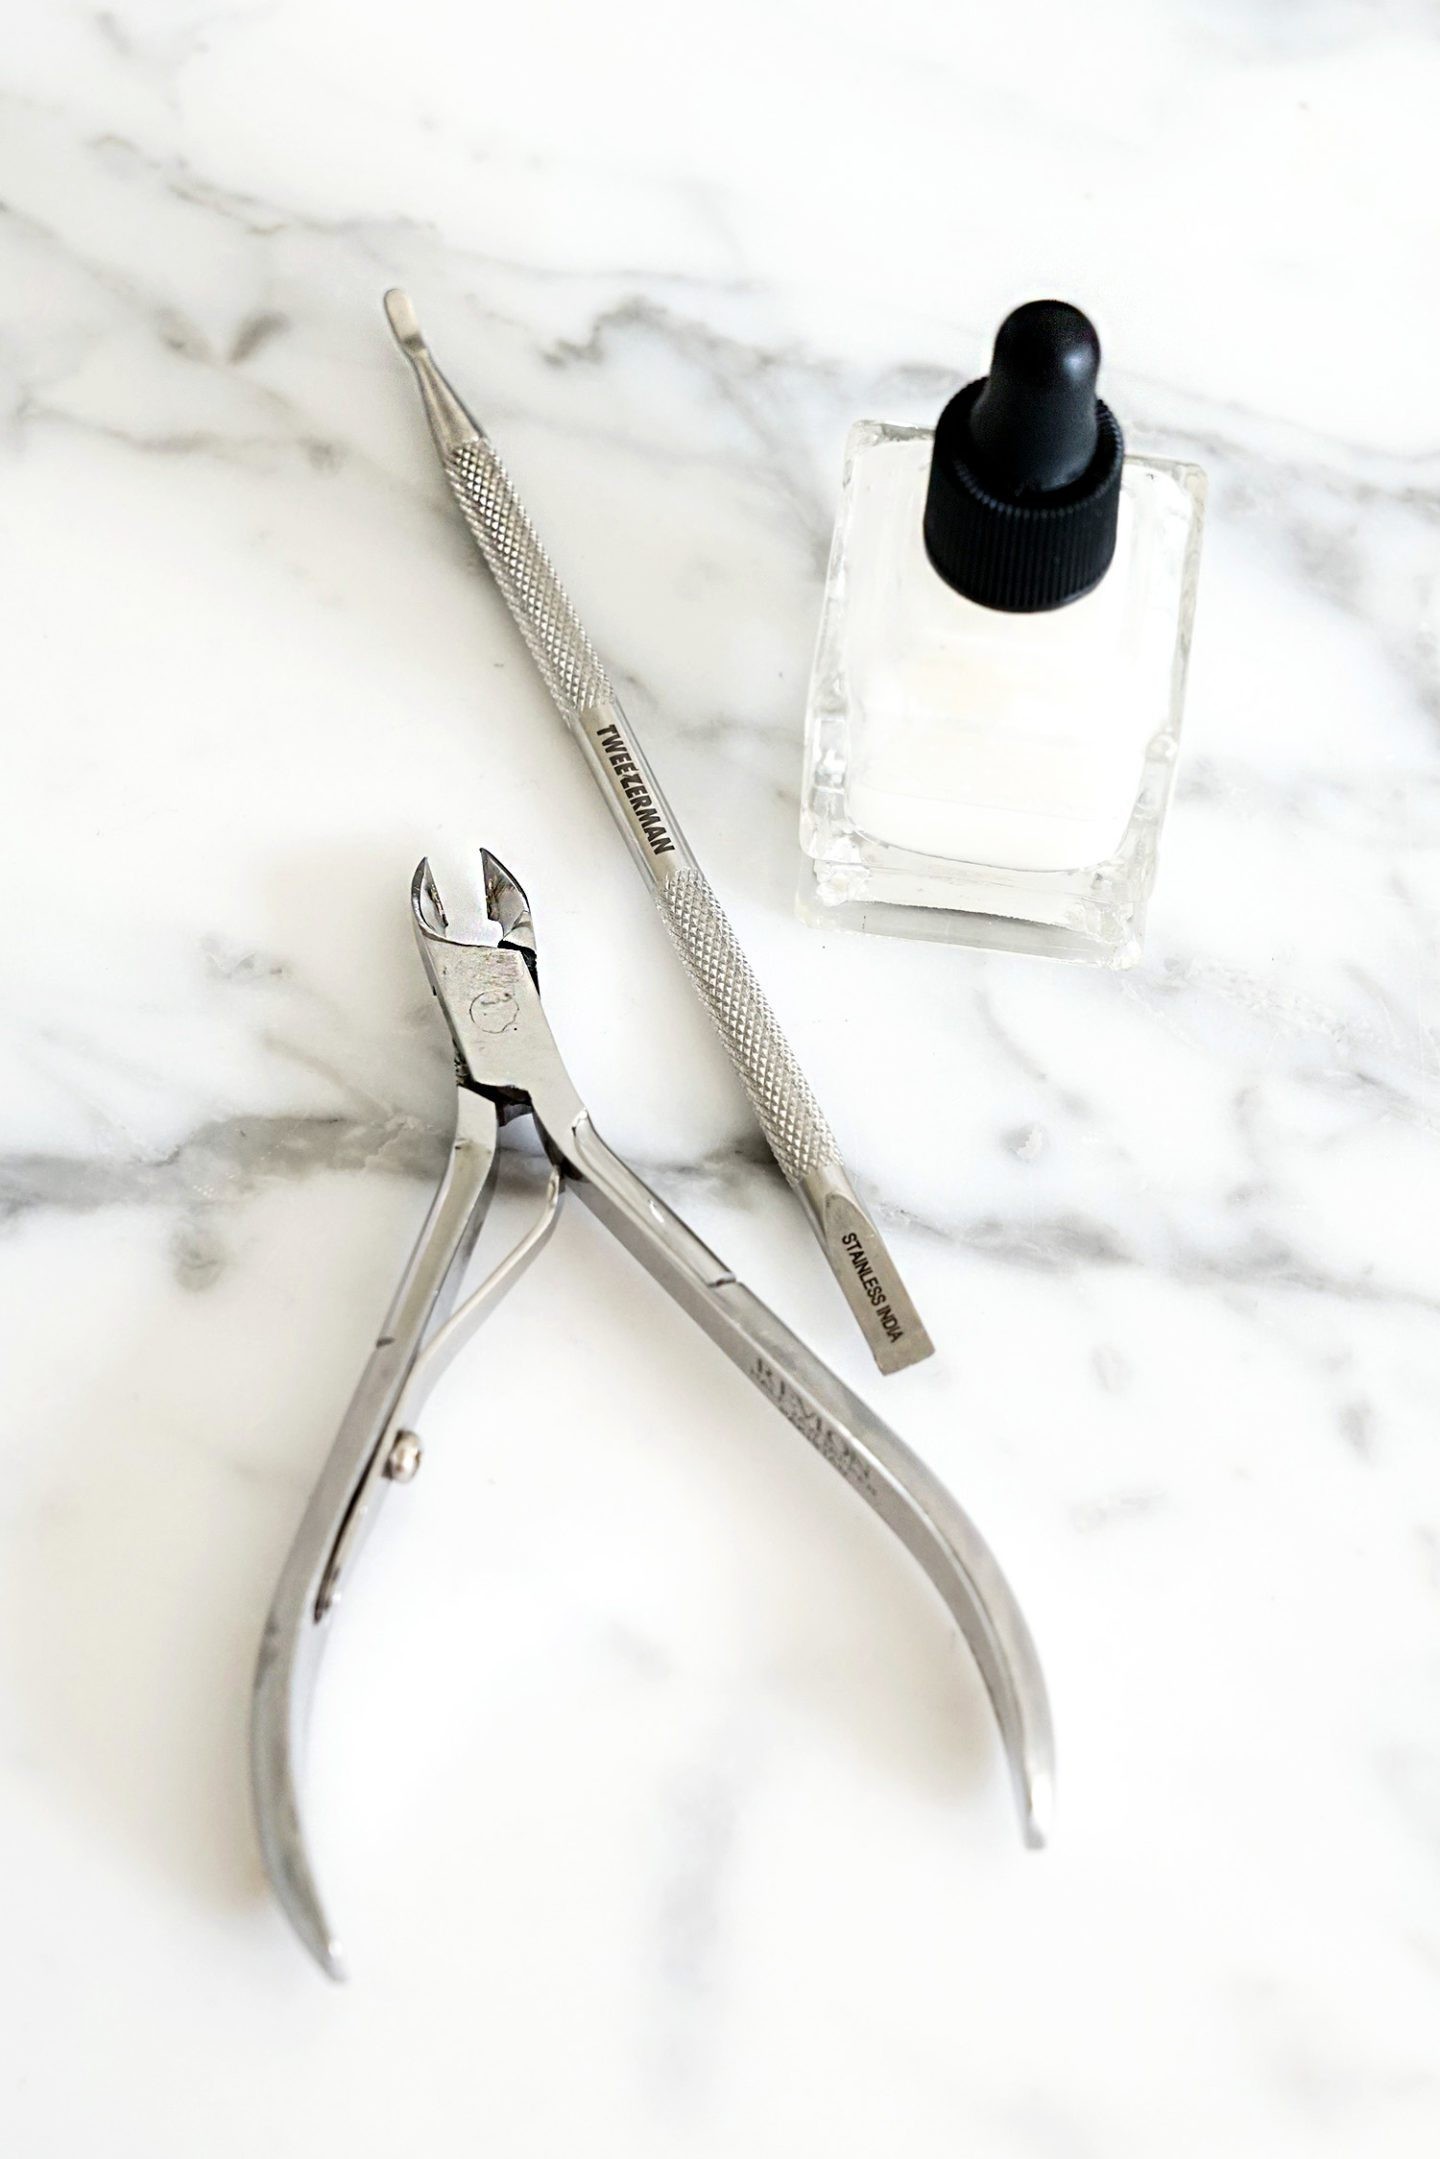
To achieve a professional-looking manicure at home, you need the right set of tools. Each tool plays a specific role in nail care, from shaping and smoothing to cuticle maintenance. Let’s explore the must-have tools and learn how to use them correctly.
Cuticle Pushers: Gentle Shaping and Preparation
Cuticle pushers are designed to gently push back the cuticles from the nail plate. This tool helps to create a cleaner nail bed and promotes healthy nail growth.
How to Use a Cuticle Pusher:
- Soften Cuticles: Start by soaking your fingertips in warm, soapy water for about 5-10 minutes. This softens the cuticles and makes them easier to push back. You can also apply a cuticle remover cream to help soften them.
- Position the Pusher: Hold the cuticle pusher at a 45-degree angle to your nail.
- Gently Push Back: Using gentle pressure, push the cuticle back towards the knuckle. Work around the nail shape, following the curve of your cuticle. Avoid using excessive force, as this can damage the nail bed.
- Clean the Nail Plate: The pusher can also be used to gently scrape away any dead skin or residue that’s stuck to the nail plate after pushing back the cuticles.
Cuticle pushers come in various materials, including metal and wood. Metal pushers are durable and easy to sanitize, while wooden pushers are gentler and disposable.
Cuticle Trimmers/Nippers: Precision Cuticle Removal
Cuticle trimmers or nippers are used to carefully trim excess cuticle skin. This step is crucial for a neat and polished manicure, but it requires caution to avoid injury or infection.
How to Use Cuticle Trimmers:
- Push Back Cuticles First: Always use a cuticle pusher to push back the cuticles before trimming. This isolates the excess skin that needs to be removed.
- Identify Excess Skin: Look for loose or hanging pieces of cuticle skin that are detached from the nail. These are the parts you want to trim.
- Trim Carefully: Hold the nippers at a slight angle and carefully trim only the excess skin. Use small, precise snips. Never cut into the live cuticle attached to the nail, as this can cause pain, bleeding, and increase the risk of infection.
- Moisturize: After trimming, apply cuticle oil or hand cream to keep the cuticles moisturized and prevent them from drying out or becoming ragged.
If you are unsure about trimming your cuticles, it’s best to start by pushing them back only. Over time and with practice, you can gradually incorporate trimming into your routine.
Nail Files: Shaping and Refining Nail Edges
Nail files are essential for shaping the nails and smoothing rough edges. Different grits of nail files are available, with lower grits being coarser for shaping and higher grits being finer for finishing.
How to Use a Nail File:
- Choose the Right Grit: For shaping, use a medium-grit file (around 180 grit). For refining and smoothing, use a fine-grit file (240 grit or higher).
- File in One Direction: File your nails in one direction, from the side towards the center of the nail tip. Avoid sawing back and forth, as this can weaken the nail and cause splitting.
- Shape Gradually: Shape your nails gradually, checking the shape frequently to ensure symmetry and desired form (square, oval, round, etc.).
- Smooth Edges: After shaping, use a finer grit file to smooth any rough edges and refine the nail shape for a clean finish.
Different nail file materials include emery boards, glass files, and metal files. Glass files are known for being gentle and durable, while emery boards are inexpensive and disposable.
Nail Buffers: Smoothing Nail Surfaces and Adding Shine
Nail buffers are used to smooth the surface of the nails and create a natural shine. They typically have multiple sides with varying grits, each serving a different purpose.
How to Use a Nail Buffer:
- Start with a Coarse Grit: Begin with the coarsest side of the buffer to smooth out any ridges or imperfections on the nail surface. Use gentle, back-and-forth motions.
- Move to Finer Grits: Progress to the finer grit sides of the buffer. Each side refines the nail surface further, making it smoother and shinier.
- Buff for Shine: The final, usually smoothest, side of the buffer is used to create shine. Buff gently in back-and-forth motions until you achieve the desired shine.
- Avoid Over-Buffing: Be careful not to over-buff, as excessive buffing can thin and weaken the nails. Buffing once every two weeks is generally sufficient.
Buffing not only enhances the natural look of your nails but also helps nail polish adhere better and last longer.
Nail Polish Removers: Effective and Gentle Removal
Nail polish remover is used to remove old nail polish and prepare the nails for a fresh manicure. Choosing a gentle yet effective remover is important to avoid drying out the nails and surrounding skin.
How to Use Nail Polish Remover:
- Choose the Right Remover: Acetone-based removers are very effective but can be drying. Non-acetone removers are gentler but may take longer to remove dark or glitter polishes. For sensitive nails, opt for non-acetone formulas.
- Saturate a Cotton Pad: Soak a cotton pad with nail polish remover.
- Press and Hold: Press the saturated cotton pad firmly on the nail for a few seconds to allow the remover to dissolve the polish.
- Wipe Away Polish: Wipe the cotton pad downwards from the cuticle to the nail tip to remove the polish. Repeat as necessary until the nail is clean. For stubborn polish, you may need to hold the pad on the nail for a bit longer.
- Wash and Moisturize: After removing polish, wash your hands with soap and water to remove any residue from the remover. Follow up with hand cream or cuticle oil to rehydrate the nails and skin.
Using a quality nail polish remover and moisturizing afterwards is crucial for maintaining nail health, especially with frequent manicures.
Step-by-Step Guide to Using Nail Care Tools
Putting it all together, here’s a step-by-step guide on how to use your nail care tools for a complete DIY manicure:
- Prepare Your Nails: Start by removing any old nail polish with nail polish remover. Wash your hands and soak your fingertips in warm, soapy water for 5-10 minutes to soften the cuticles.
- Cuticle Care: Apply cuticle remover cream if desired. Use a cuticle pusher to gently push back the cuticles. If needed, carefully trim any excess cuticle skin with cuticle nippers.
- Shape Your Nails: Use a nail file to shape your nails to your desired shape. File in one direction to avoid weakening the nails.
- Buff Your Nails: Use a nail buffer to smooth the surface of your nails and create a natural shine. Start with the coarser grit and progress to finer grits.
- Clean and Moisturize: Wash your hands again to remove any nail dust. Apply hand cream and cuticle oil to moisturize your hands and nails.
- Apply Base Coat: Apply a thin layer of base coat to protect your nails and help nail polish adhere better.
- Apply Nail Polish: Apply two thin coats of your chosen nail polish color, allowing each coat to dry slightly before applying the next.
- Apply Top Coat: Finish with a top coat to seal in the color, add shine, and prolong the life of your manicure.
Tips for Maintaining Your Nail Care Tools
Proper maintenance of your nail care tools is essential for hygiene and tool longevity:
- Clean After Each Use: Clean metal tools like cuticle pushers and nippers with rubbing alcohol or soap and water after each use to prevent bacteria buildup.
- Replace Files and Buffers: Emery boards and buffers should be replaced regularly, especially if they become worn or difficult to clean.
- Store Properly: Store your tools in a clean, dry place. Consider using a tool case or pouch to keep them organized and protected.
Conclusion
Mastering the use of nail care tools is fundamental to achieving beautiful and healthy nails with DIY manicures. With practice and the right techniques, you can confidently care for your nails at home, saving time and money while enjoying the process. Invest in quality tools, follow these guidelines, and you’ll be well on your way to perfecting your at-home manicure routine.