**
As a car owner, you’re likely attuned to the nuances of your vehicle. You know the typical sounds, smells, and how it should generally perform. However, when the unexpected happens – a check engine light illuminates, strange noises emerge, or performance dips – it’s natural to feel a sense of unease. This is precisely when understanding How To Perform Diagnostic On Your Car By Yourself becomes invaluable.
In an era where automotive technology is increasingly complex, diagnosing car troubles might seem daunting. Yet, with the right knowledge and tools, you can confidently take the first step in understanding your vehicle’s health. This guide will equip you with the essential information and step-by-step instructions on how to conduct a car diagnostic test at home, empowering you to address potential issues proactively.
Understanding Car Diagnostic Tests
A car diagnostic test is a process of identifying potential malfunctions within your vehicle’s various systems. Modern vehicles are equipped with sophisticated onboard computer systems that monitor a vast array of components, from the engine and transmission to the exhaust and braking systems. When these systems detect an anomaly, they often trigger warning lights on your dashboard, such as the check engine light.
Diagnostic tests delve deeper than just warning lights. They can pinpoint issues within:
- Engine: Performance, fuel efficiency, emissions.
- Transmission: Shifting problems, fluid leaks, electronic controls.
- Exhaust System: Catalytic converter efficiency, oxygen sensor readings, leaks.
- Ignition System: Misfires, coil pack failures, spark plug issues.
- Fuel System: Fuel pump problems, injector malfunctions, pressure irregularities.
- Braking System (ABS): Sensor failures, hydraulic issues, module malfunctions.
- And much more: Including airbags, climate control, and other electronic systems.
Traditionally, car diagnostic tests were primarily conducted by mechanics and dealerships. However, advancements in technology have made it increasingly accessible for car owners to perform these initial diagnostics themselves. This empowers you to understand your car’s issues firsthand and make informed decisions about maintenance and repairs.
Why Bother with DIY Car Diagnostics?
Many car owners default to taking their vehicles to a mechanic only when a serious problem arises. This reactive approach often leads to waiting until a minor issue escalates into a major, and more costly, repair. Ignoring warning signs, like a persistent check engine light, can lead to further damage and potentially higher repair bills down the line.
Learning how to perform diagnostic on your car by yourself offers a proactive and cost-effective alternative. Regular DIY diagnostics can help you:
- Catch Minor Issues Early: Identify small problems before they become major breakdowns.
- Prevent Costly Repairs: Address issues when they are simpler and less expensive to fix.
- Save Money on Diagnostic Fees: Avoid paying mechanic fees just to identify the problem.
- Gain Knowledge About Your Car: Understand your vehicle’s systems and health better.
- Make Informed Repair Decisions: Go to a mechanic with a clearer understanding of the problem, reducing the risk of unnecessary repairs or scams.
In essence, DIY car diagnostics empowers you to be a more informed and proactive car owner, potentially saving you time, money, and stress in the long run.
Time and Cost Considerations for Car Diagnostic Tests
Typically, a basic car diagnostic test is a relatively quick procedure, often taking just a few minutes. The initial step involves reading the diagnostic trouble codes (DTCs), also known as OBD2 codes. This process, which utilizes a car diagnostic scanner, is usually completed within minutes. Mechanics use these scanners to retrieve codes that indicate potential problem areas within the vehicle.
After obtaining the DTCs, mechanics typically conduct further investigation to gain a more comprehensive understanding of the issue and determine the most effective repair strategy based on the specific error codes.
If you opt for a professional diagnostic service at an auto repair shop, it’s wise to allocate some time. Expect to wait briefly before the test and then spend additional time discussing the findings and potential solutions with the mechanic. A reasonable time estimate for a professional car diagnostic test could range from one to three hours.
The cost of a professional car diagnostic test can vary significantly depending on factors such as your vehicle’s make and model, the complexity of the issue, and the labor rates of the repair shop. Industry experts suggest that you could expect to pay anywhere from $40 to $400 for a diagnostic test at a dealership or mechanic shop, and this cost is before any actual repairs are undertaken.
While some establishments advertise “free car diagnostic services,” it’s crucial to be aware of potential hidden costs. Often, these “free” services may only cover the initial code retrieval. Further investigation and labor to diagnose the root cause of the problem are typically billed separately, potentially falling within the $40 to $400 range mentioned earlier. Furthermore, some auto parts stores that offer free code reading may encourage you to purchase a scanner from their store.
Considering the simplicity of the initial code reading process, learning how to perform diagnostic on your car by yourself at home offers a significant advantage in terms of both time and cost savings. The next section will guide you through the steps of conducting a DIY car diagnostic test.
Step-by-Step Guide: How to Perform a Car Diagnostic Test at Home
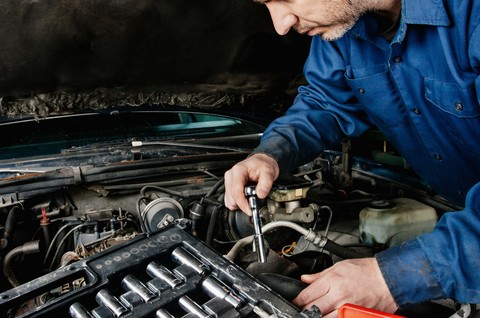
Performing a car diagnostic test at home is simpler than you might think. It primarily involves two key steps and doesn’t require extensive automotive expertise. The core process revolves around reading OBD2 codes and understanding their meaning.
Step 1: Reading Diagnostic Trouble Codes (DTCs)
The first crucial step in any car diagnostic test is reading the Diagnostic Trouble Codes (DTCs), also known as On-Board Diagnostic Codes (OBD Codes). The OBD system was standardized and mandated in the United States for all vehicles manufactured and sold after 1996. This standardization ensures that all post-1996 vehicles are equipped with a universal diagnostic system that can be accessed using standard OBD2 scanners or readers.
An OBD2 scanner is a handheld device that plugs into your car’s OBD2 port, typically located under the dashboard on the driver’s side. This scanner communicates with your vehicle’s computer and retrieves any stored DTCs. These codes are essentially error messages that your car’s computer has recorded, indicating potential issues within different systems.
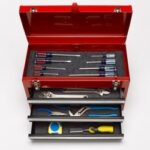
To perform this step, you will need an OBD2 scanner. These scanners are readily available online and at auto parts stores, ranging in price from basic, budget-friendly models to more advanced, feature-rich options.
Here’s how to read DTCs:
- Locate the OBD2 Port: Consult your vehicle’s owner’s manual if you are unsure of its exact location.
- Plug in the OBD2 Scanner: Turn your car’s ignition to the “ON” position (do not start the engine). Connect the OBD2 scanner to the OBD2 port.
- Power On the Scanner: Follow the scanner’s instructions to power it on and establish a connection with your vehicle’s computer.
- Read Codes: Navigate the scanner’s menu to the “Read Codes” or “Diagnostic Codes” option. The scanner will then retrieve and display any stored DTCs.
- Record the Codes: Note down all the displayed DTCs. These codes will be crucial for the next step: interpretation.
Step 2: Interpreting DTCs and Further Investigation
Once you have a list of DTCs, the next step is to understand what these codes mean and how they relate to potential problems in your car. DTCs are standardized codes, meaning a P0442 code, for example, will generally indicate the same type of issue across different vehicle makes and models.
Interpreting DTCs involves:
- Code Lookup: Use a reliable resource to look up the meaning of each DTC you recorded. Many OBD2 scanners, especially Bluetooth-enabled models paired with smartphone apps, offer built-in code definitions. Alternatively, numerous websites and online databases provide comprehensive DTC information. A valuable resource is obd2-codes.co, which offers detailed explanations of DTCs, including potential symptoms, causes, and basic diagnostic steps.
- Understanding Code Categories: DTCs are categorized by the system they relate to (e.g., P-codes for powertrain, B-codes for body, C-codes for chassis, U-codes for network). This categorization can help narrow down the potential area of the problem.
- Considering Symptoms: Combine the DTC information with any symptoms you’ve observed in your vehicle (e.g., rough idling, poor fuel economy, unusual noises). This holistic approach provides a more complete picture of the potential issue.
- Basic Troubleshooting: For some simpler codes, the code definition and resources like obd2-codes.co may suggest simple DIY checks or fixes. For instance, a P0442 code (Evaporative Emission Control System Leak Detected – Small Leak) could be triggered by a loose gas cap, a simple issue to check and rectify.
For more complex codes or when you are unsure about the diagnosis, it is always recommended to consult a qualified mechanic. However, by performing the initial diagnostic test and understanding the DTCs, you are already better informed and equipped to discuss the issue with a professional, potentially saving time and money on unnecessary diagnostic labor.
Step 3: Utilizing Video Resources for DIY Fixes
For added support in understanding and potentially resolving car issues at home, consider leveraging video resources. Platforms like YouTube host a wealth of automotive repair videos, many of which specifically address common DTCs and offer step-by-step DIY repair guides.
For example, the nonda Auto DIY Center YouTube channel provides helpful videos demonstrating fixes for various DTCs. These videos can be particularly useful for visual learners and can guide you through simple repairs you might be able to undertake yourself.
Remember: While these resources can be incredibly helpful, always prioritize safety and exercise caution when working on your vehicle. If you are uncomfortable or unsure about any repair procedure, it is best to seek professional assistance.
Embracing DIY Car Diagnostics: You Don’t Need to Be a Mechanic
As outlined, how to perform diagnostic on your car by yourself is not an overly complex task. It’s accessible to car owners with varying levels of automotive knowledge. You don’t need to be a seasoned mechanic to begin checking your vehicle’s health. Starting with basic diagnostics empowers you to proactively manage your car’s maintenance and potentially save significant time and money.
By understanding DTCs and performing simple troubleshooting steps, you can often address minor issues yourself, avoiding costly mechanic visits for problems that don’t require extensive expertise. Even when professional repair is necessary, having performed the initial diagnostic test provides you with valuable knowledge to discuss the issue intelligently with your mechanic, ensuring transparency and preventing potential overcharging or unnecessary services.
Conclusion: Take Control of Your Car’s Health
Regular car diagnostic tests are a vital aspect of vehicle maintenance, enabling you to identify and address minor issues before they escalate into major problems. While professional mechanic services are readily available, learning how to perform diagnostic on your car by yourself offers a practical and economical approach for proactive car care.
DIY diagnostics empowers you to understand your vehicle better, catch problems early, and make informed decisions about maintenance and repairs. Even if you ultimately require professional assistance, the knowledge gained from performing a DIY diagnostic test puts you in a stronger position as a car owner.
Enhance Your DIY Diagnostics with ZUS Smart Vehicle Health Monitor (Free Offer!)
To further simplify and enhance your car diagnostic experience, consider utilizing the ZUS Smart Vehicle Health Monitor. This device, coupled with the free ZUS app, provides real-time vehicle health monitoring and diagnostic information directly to your smartphone.
Key benefits of the ZUS Smart Vehicle Health Monitor:
- Real-time Vehicle Health Monitoring: Continuously monitors your car’s condition.
- Proactive Issue Detection: Checks vehicle health every time you start your car.
- User-Friendly: Easy to install and use.
- DTC Alerts and Explanations: Alerts you to OBD2 codes and provides clear explanations.
- DTC History: Records all past OBD2 codes for tracking and reference.
- Free Device & App: Currently offered as a FREE device (with shipping fee) with a free companion app for both Android and iOS.
Take advantage of the current FREE GIVEAWAY campaign for the ZUS Smart Vehicle Health Monitor and equip yourself with a powerful tool for DIY car diagnostics. Don’t miss this opportunity to take proactive control of your vehicle’s health and potentially save money on future repairs.
Start your journey towards becoming a more informed and empowered car owner today!
(Note: Please check the website for the latest details on the FREE GIVEAWAY campaign and any associated shipping fees.)