Hearing an unusual noise from your car engine can be unsettling. You pop the hood, take a look around, but everything seems normal to the untrained eye. Before you start guessing or making costly trips to the mechanic, there’s a smarter first step: running a car diagnostic. Using a car diagnostic tool, also known as an OBD-II scanner, is a straightforward way to understand what’s happening under the hood and can empower you to tackle car maintenance like a pro.
This guide will walk you through the process of How To Run A Car Diagnostic, helping you decipher those mysterious engine woes and potentially save time and money on car repairs.
When Should You Use a Car Diagnostic Tool?
It’s important to understand that a car diagnostic tool isn’t a magic wand that fixes every car problem. It won’t inflate a flat tire or replace worn brake pads. Instead, think of it as a vital communication device, bridging the gap between your car’s computer and your understanding of its health. The most common scenario for using a diagnostic tool is when that dreaded “Check Engine” light illuminates on your dashboard. However, its uses extend beyond just that warning signal.
- When the Check Engine Light Comes On: This light, often a source of anxiety for car owners, signals that your vehicle’s onboard computer has detected an issue in the engine, transmission, or exhaust system. Ignoring it isn’t wise, but panicking is also unnecessary. A car diagnostic scan tool is your first step to understanding what’s triggering the light, turning that vague warning into actionable information.
- Monitoring Vehicle Performance and Data: Advanced car diagnostic tools offer more than just reading error codes. They can access live data from your car’s systems, providing real-time insights into engine performance, sensor readings, and more. This feature is valuable for enthusiasts who like to fine-tune their vehicle’s performance or for tracking down intermittent issues that may not always trigger the check engine light.
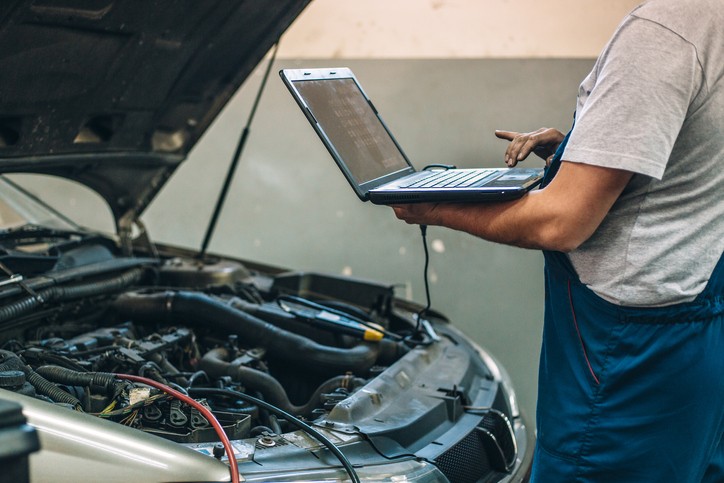 A person using a computer a monitor an engine
Using a car diagnostic scanner is a straightforward process, empowering car owners to understand their vehicle’s health.
Essential Tools for Running a Car Diagnostic
Diagnosing your car’s issues with a diagnostic tool is surprisingly simple in principle. While fixing the underlying problems might require mechanical skills and tools, the diagnostic process itself is accessible to most car owners. Here’s what you’ll need:
- OBD-II Diagnostic Tool (or OBD2 Scanner): This is the core of the operation. An OBD-II scanner plugs into your car’s diagnostic port and communicates with its computer to retrieve trouble codes. These scanners range from basic, affordable code readers to more advanced models with features like live data streaming and Bluetooth connectivity. Look for scanners specifically listed as “OBD2 scanners” for compatibility with modern vehicles.
- Post-1996 Vehicle: Since 1996, vehicles manufactured for sale in the United States are mandated to have an OBD-II (On-Board Diagnostics II) system and port. This standardized system ensures compatibility with diagnostic tools. If your car is older than 1996, it may have an older OBD-I system or lack a standardized diagnostic port, making OBD-II scanners incompatible. For older vehicles, diagnosis may require traditional methods or professional expertise.
Preparation Steps Before Starting a Car Diagnostic Scan
Using a car diagnostic tool is designed to be user-friendly. It primarily involves plugging in the device and following the on-screen prompts. The key beforehand is knowing where to plug it in and setting things up correctly.
- Locate Your Car’s OBD-II Port: The OBD-II port is typically located within the passenger compartment, usually near the steering wheel and underneath the dashboard. Common locations include under the dash on the driver’s side, near the center console, or even on the passenger side in some vehicles. If you’re unsure, consult your car’s owner’s manual for the precise location of the OBD-II port.
- Turn Off Your Vehicle’s Ignition: Before connecting the automotive scan tool, ensure your car’s ignition is turned off. This is a standard precaution to ensure a stable connection and prevent any electrical issues during the diagnostic process.
Step-by-Step Guide: How to Run a Car Diagnostic
Car diagnostic tools are generally designed to be intuitive. Most operate on a “plug-and-scan” principle, although some advanced models offer additional functionalities. Here’s the standard procedure for using a code reader to perform a car diagnostic:
Using a Code Reader to Run a Car Diagnostic
The fundamental purpose of a diagnostic scan tool is to retrieve Diagnostic Trouble Codes (DTCs) that your car’s computer records when it detects a malfunction. This is the same initial step mechanics take when diagnosing car problems, although they may use more sophisticated, professional-grade equipment.
Step 1: Connect the Diagnostic Tool to the OBD-II Port
Diagnostic tools access data through your vehicle’s OBD-II port. This universal port provides access to a wealth of information about your car’s systems. To establish communication, you’ll need to connect your scanner properly.
- Plug the OBD-II scanner connector into the vehicle’s OBD-II port. Ensure a firm and secure connection to allow for proper communication between the tool and your car’s computer. A loose connection can lead to errors or failed readings.
- Turn the car’s ignition to the “ON” position. In most cases, you don’t need to fully start the engine for the scanner to read stored codes. Turning the ignition to “ON” provides power to the car’s computer and the OBD-II port. However, some advanced diagnostic functions or live data readings might require the engine to be running, depending on your scanner and vehicle.
Step 2: Power On the Diagnostic Tool and Read Car Codes
The diagnostic trouble codes are the key to understanding what’s amiss with your vehicle. The diagnostic tool retrieves and displays these codes, providing a starting point for diagnosis. Don’t attempt to decipher these codes manually, as they are designed to be read by a scanner or interpreted through a code database.
- Power on the diagnostic tool. Basic code readers typically have a simple power button. Press it to turn the device on.
- For Bluetooth-enabled scanners, the device may power on automatically when plugged into the OBD-II port, or you might need to activate it through a button or an app.
- Initiate the diagnostic scan. Some scanners start reading codes automatically upon powering on. Others might require you to press a “Scan,” “Read Codes,” or similar button or menu option to begin the process.
- For Bluetooth scanners, you’ll need to use a compatible app on your smartphone or tablet. Some scanners come with a dedicated app, while others work with various third-party OBD-II apps. Ensure compatibility before purchasing a Bluetooth scanner.
- On initial use with a new vehicle, some scanners or apps may prompt you to enter your Vehicle Identification Number (VIN). This helps the tool identify your specific car model and ensure accurate code interpretation.
- Record the Diagnostic Trouble Codes (DTCs). Once the scan is complete (usually within seconds), the scanner will display any detected trouble codes or error codes. Carefully note these codes.
- Some scanners provide a brief description of the code’s meaning directly on the screen. Others may only display the code itself (e.g., P0301).
- Many scanners have features to save or store the scanned codes, download them to a computer, or access online databases for code definitions. Bluetooth scanner apps often link to extensive diagnostic services for detailed information.
- Optional: Clear the Car Codes. Most diagnostic tools have a “Clear Codes” or “Erase Codes” function. Using this will clear the trouble codes and turn off the Check Engine light. However, it’s generally recommended not to clear codes until you have identified and addressed the underlying issue. Clearing codes without fixing the problem will only result in the Check Engine light turning back on, and you might lose valuable diagnostic information. Clearing codes is typically done after repairs are completed to confirm the issue is resolved and to reset the system.
Step 3: Interpret the Diagnostic Trouble Codes (DTCs)
Looking at a string of alphanumeric codes can be confusing. Interpreting these Diagnostic Trouble Codes (DTCs) is the next crucial step to understanding the problem. Here’s how to translate those codes into understandable language:
- Option 1: Online Code Search. The quickest and often most accessible method is to search online for the specific trouble code. Use a search engine (like Google, Bing, etc.) and type in the code (e.g., “P0301 code”). Numerous automotive websites, forums, and manufacturer-specific resources will provide definitions, potential causes, and common fixes for the code.
- Option 2: Specialized Software or Apps. Some aftermarket software programs or smartphone apps are designed to work with diagnostic tools. These programs can download codes from your scanner and provide detailed descriptions, possible causes, troubleshooting steps, and even repair guides. Some Bluetooth scanner apps offer this functionality directly.
- Option 3: Scanner with Built-in Code Definitions. Higher-end diagnostic tools often have built-in databases that provide code definitions directly on the scanner’s screen. These scanners may offer varying levels of detail, from a basic description to more in-depth information about the potential problem.
Step 4: Address the Problem Based on Diagnostic Information
Once you have interpreted the DTC and have an understanding of the potential issue, the final step is to address the problem and get your car back in top shape. This stage depends heavily on your automotive knowledge, skills, and available tools.
- Option 1: DIY Repair. If you possess automotive repair experience and have the necessary tools, the diagnostic information you’ve gathered provides a solid starting point for troubleshooting and repair. The trouble code and its description can guide you to the affected system or component.
- Be aware that DTCs often point to a symptom or an area of concern rather than pinpointing the exact faulty part. For example, a misfire code (like P0301) might indicate a problem with the spark plug, ignition coil, fuel injector, or even a vacuum leak. Further investigation is often needed.
- Basic diagnostic tools provide limited information compared to professional-grade equipment. Mechanics use advanced scanners that can monitor a wider range of systems, perform component tests, and offer more detailed diagnostics. DIY repairs based on basic scanner information should be approached with caution and may be best suited for simpler issues.
- Option 2: Seek Professional Mechanic Assistance. If you lack the experience, tools, or confidence to perform the repair yourself, it’s always a wise decision to consult a qualified professional mechanic. Automotive repair can be complex, and attempting repairs without proper knowledge can lead to further damage or safety issues.
- When you take your car to a mechanic, bring the diagnostic trouble codes you recorded. This gives the mechanic a valuable head start in diagnosing the problem and can save diagnostic time and costs.
Pro Tips for Effective Car Diagnostics
- Deep Dive into Code Meanings Online: When searching for trouble code definitions online, go beyond the basic description. Look for forums, manufacturer websites, or reputable automotive resources that discuss common causes, troubleshooting steps, and verified fixes for your specific code and vehicle model.
- Consider a Scanner with Live Data: If you plan to use a diagnostic tool frequently or want to understand your car’s performance in more detail, invest in a scanner that offers live data streaming. This feature allows you to monitor real-time sensor readings (e.g., engine temperature, RPM, O2 sensor voltages) which can be invaluable for diagnosing intermittent problems or performance issues.
- Bring Codes to Your Mechanic: Even if you plan to have a mechanic fix your car, running a diagnostic scan yourself and bringing the codes with you is beneficial. It demonstrates you’ve taken initiative, provides the mechanic with initial diagnostic information, and can potentially streamline the repair process.
- Don’t Clear Codes Prematurely: Avoid clearing trouble codes or resetting the Check Engine light before you’ve identified the underlying problem. The codes are valuable clues. Clearing them without addressing the issue will likely result in the light coming back on, and you’ll lose the initial diagnostic information.
Common Questions About Car Diagnostics (FAQ)
Q. My car is older than 1996. Can I use a scanner tool?
A. Not an OBD-II scanner. Vehicles older than 1996 may have an older OBD-I system, which uses different connectors and protocols, or they might not have a standardized diagnostic port at all. OBD-II scanners are specifically designed for vehicles with OBD-II ports, which are standard on post-1996 models in the US and many other countries.
Q. What types of issues can an OBD-II scanner detect?
A. The range of issues an OBD-II scanner can detect depends on the scanner’s capabilities and your vehicle’s systems. Most basic OBD-II scanners can detect any issue that triggers the Malfunction Indicator Light (MIL), commonly known as the Check Engine light. This includes problems related to the engine, transmission, emissions system, and some ABS and SRS (airbag) system faults on newer vehicles. Advanced scanners can access more systems and data.
Q. Will a diagnostic tool work on cars manufactured outside the U.S.?
A. Yes, in many cases. The OBD-II standard is based on global standards. For example, European vehicles often use the European On-Board Diagnostics (EOBD) system, which is largely compatible with OBD-II. Many diagnostic tools support both OBD-II and EOBD protocols, making them compatible with a wide range of vehicles sold internationally. However, always check the scanner’s specifications to ensure compatibility with your specific car make and model, especially for vehicles from regions with unique diagnostic standards.
By understanding how to run a car diagnostic, you can take a more proactive role in your car’s maintenance, understand those mysterious warning lights, and make informed decisions about car repairs. Using a car diagnostic tool is a valuable skill for any car owner, empowering you to keep your vehicle running smoothly and efficiently.